Here we will learn what is cross site request forgery (CSRF) attacks in asp.net mvc and how to protect asp.net mvc application against cross site request forgery attack.
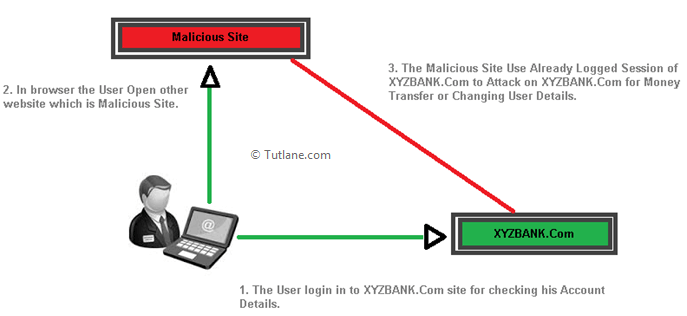
Cross-Site Request Forgery is an attack in which the User or Victim is already login to a Valid site (XYZBANK.Com). In the same way, the Victim opens some other Malicious site in another tab, the Malicious site sends a request to a valid site (XYZBANK.Com) using logged-in session of the victim for an attack as (XYZBANK.Com) only know that the request which is coming from valid User and it Execute the task and Victim has been attacked using Cross Site Request Forgery.
Microsoft has recognized this threat, and for preventing it, it has provided AntiForgeryToken. It is simple to use add @Html.AntiForgeryToken() on View, and on HttpPost of Action Method, we need to add attributes to validate it [ValidateAntiForgeryToken].
Generally AntiForgeryToken only work for [HttpPost] Request. Now we will learn how to use AntiForgeryToken to prevent cross site request forgery by creating a simple Application in Visual Studio.
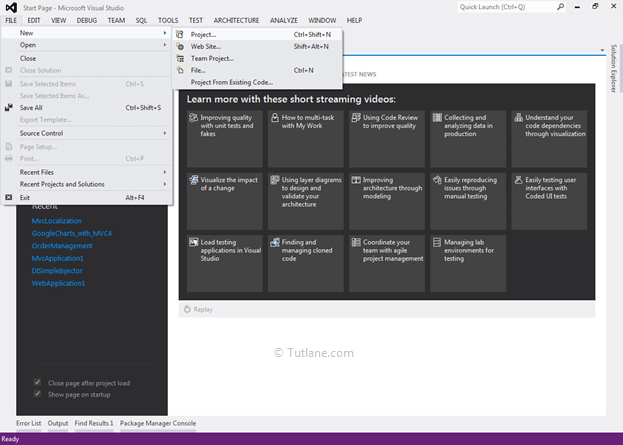
Let's start with creating a new asp.net mvc 4 application for that Open visual studio à Go to File à Select New à Select Project.
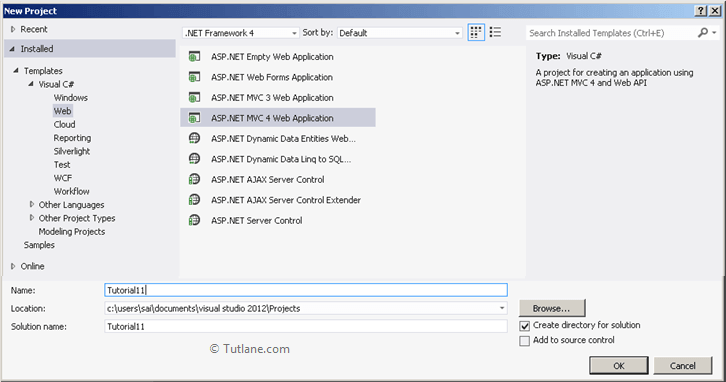
After that, you will see a new dialog for selecting your Template and Project type. From Templates, select Visual C# à inside that select Web and then project type select ASP.NET MVC 4 Web Application, and here we are giving the name as “Tutorial11” finally click on ok button.
After naming it, click on OK button, a new dialog will pop up for selecting a template in that Select Basic template, and select view engine as Razor then click ok like as shown below.

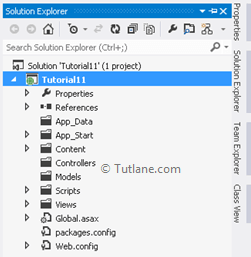
After click OK, it will create asp.net mvc that will be like as shown below.
Now let’s add a simple Model in Model Folder with Name StudentDetails. To add Model, right-click on Model Folder and select Add à and then select Class and Name your class as StudentDetails.
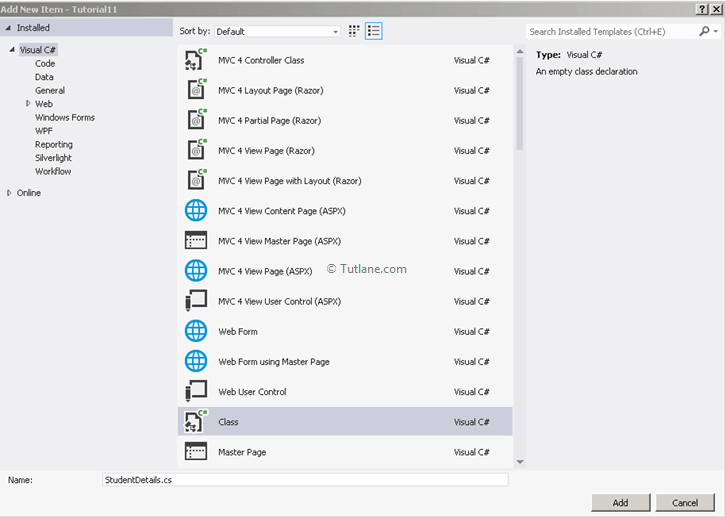
After creating Model StudentDetails, now let's add Properties like as shown below.
using System;
using System.Collections.Generic;
using System.ComponentModel.DataAnnotations;
using System.Linq;
using System.Web;
namespace Tutorial11.Models
{
public class StudentDetails
{
[Key]
public int StudentID { get; set; }
[Required (ErrorMessage="Enter Name")]
public string Name { get; set; }
[Required(ErrorMessage = "Enter Address")]
public string Address { get; set; }
[Required(ErrorMessage = "Enter Division")]
public string Division { get; set; }
}
}
After completion of model creation and add Properties now we are going to add a new controller
To add controller, right-click on Controller Folder, select Add à then select Controller. As you select controller, a new dialog will popup Add Controller.
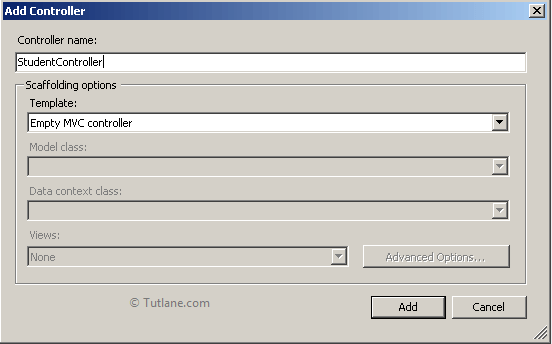
Give a name to the controller as “StudentController”, and in the template, we are not going to select any template for that we are selecting “Empty MVC controller”, then click on Add Button. The new controller "StudentController" will contain code like as shown below.
using System;
using System.Collections.Generic;
using System.Linq;
using System.Web;
using System.Web.Mvc;
namespace Tutorial11.Controllers
{
public class StudentController : Controller
{
//
// GET: /Student/
public ActionResult Index()
{
return View();
}
}
}
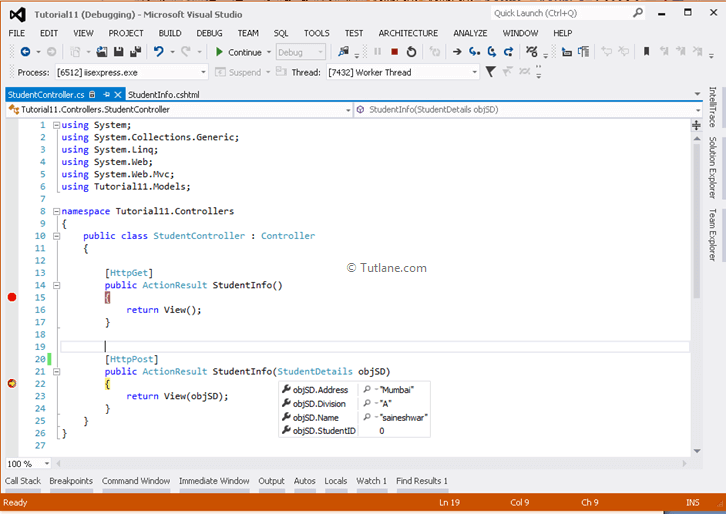
Now let’s add an action method to the student controller. We will add 2 action methods for student controller handling [HttpGet] Request and other Handling [HttpPost] Request.
using System;
using System.Collections.Generic;
using System.Linq;
using System.Web;
using System.Web.Mvc;
using Tutorial11.Models;
namespace Tutorial11.Controllers
{
public class StudentController : Controller
{
[HttpGet]
public ActionResult StudentInfo()
{
return View();
}
[HttpPost]
public ActionResult StudentInfo(StudentDetails objSD)
{
return View(objSD);
}
}
}
After adding the Action Method, let’s Add View (StudentInfo). To add view, right-click anywhere inside Action Method and select Add view, new dialog will popup Add View.
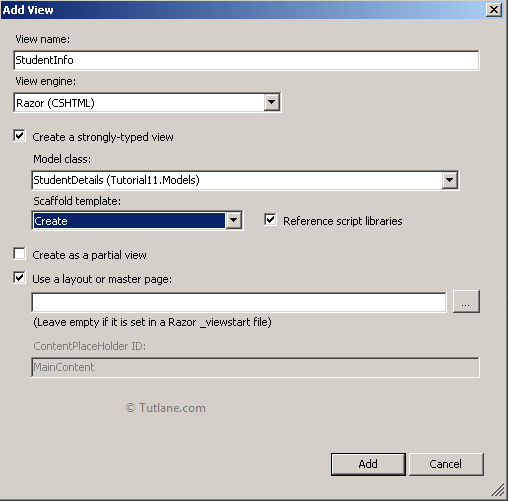
Now the name of view will be similar to the name of the action method. We are not going to change it, and View Engine will be set to Razor. We are going to create a strongly-Typed view hence we are going to check this option and select your Model that we have created StudentDetails if you are not finding your Model, build your Application and then retry this process of Adding a Strongly-Typed view. After that, we will use Scaffold Template, for that we selected Create template and finally click on Add button to add view.
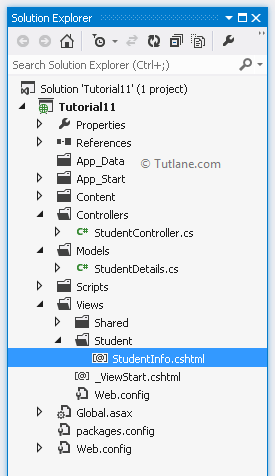
After Adding, it will create a Folder inside Views with the same name as Controller Name Student, and inside that, it will Add view (StudentInfo).
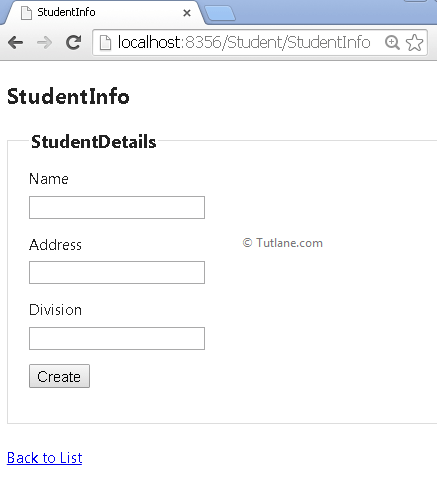
After adding StudentInfo view following is the code snippet of StudentInfo view that is generated.
@model Tutorial11.Models.StudentDetails
@{
ViewBag.Title = "StudentInfo";
}
<h2>StudentInfo</h2>
@using (Html.BeginForm()) {
@Html.ValidationSummary(true)
<fieldset>
<legend>StudentDetails</legend>
<div class="editor-label">
@Html.LabelFor(model => model.Name)
</div>
<div class="editor-field">
@Html.EditorFor(model => model.Name)
@Html.ValidationMessageFor(model => model.Name)
</div>
<div class="editor-label">
@Html.LabelFor(model => model.Address)
</div>
<divclass="editor-field">
@Html.EditorFor(model => model.Address)
@Html.ValidationMessageFor(model => model.Address)
</div>
<div class="editor-label">
@Html.LabelFor(model => model.Division)
</div>
<div class="editor-field">
@Html.EditorFor(model => model.Division)
@Html.ValidationMessageFor(model => model.Division)
</div>
<p>
<input type="submit" value="Create"/>
</p>
</fieldset>
}
<div>
@Html.ActionLink("Back to List", "Index")
</div>
@section Scripts {
@Scripts.Render("~/bundles/jqueryval")
}
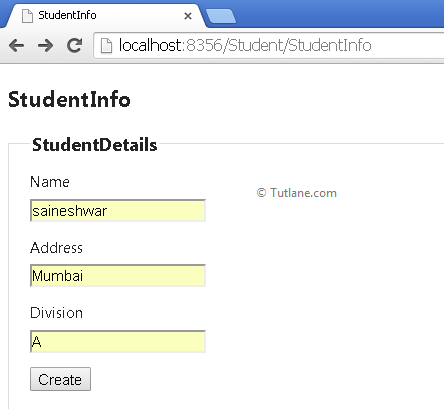
Now save your application and Run.
Now we will learn how cross-site request forgery attack will occur on the website in asp.net mvc. We created a view, and it is rendered in the browser. Right-click on view and select view page source that will be like as shown below.
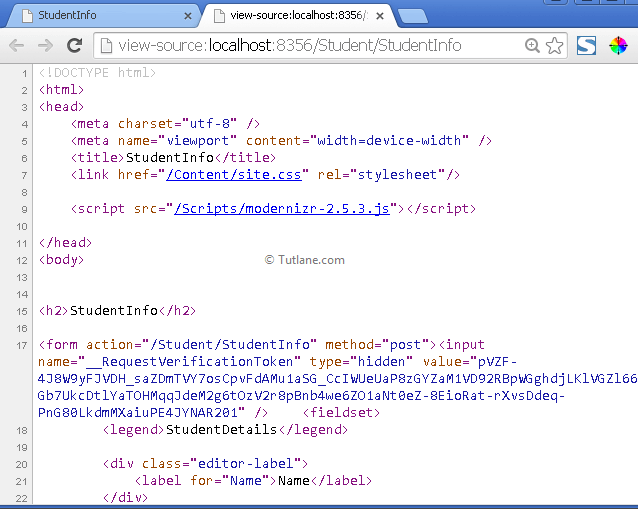
Now copy this Html and save in text file and name File as a.html like as shown below.
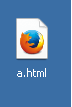
Now open this file as Txt and find line [<form action="/Student/StudentInfo" method="post">] and change this with URL which is rendered in Browser [<form action="http://localhost:8356/Student/StudentInfo" method="post">] finally save this file and now double click and open this file in browser. If you check, the file is same as our original view.
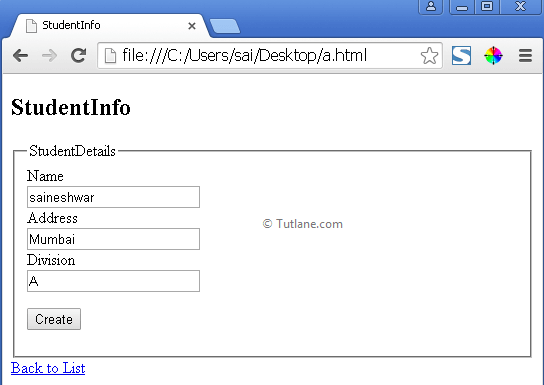
Now enter some data and click on the create button after that, you will see Magic. Ohhh, we have posted an a.html file, and Action Method StudentInfo got called with all values. This is how an attack can create for any application which is not secured.
For Preventing this attack we need to add @Html.AntiForgeryToken() to StudentInfo View like as shown below.
Now on [HttpPost] of ActionMethod we need to add [ValidateAntiForgeryToken]. Following is the way we need to add ValidateAntiForgeryToken to Studentinfo [HttpPost] Action Method.
![Adding ValidateAntiForgeryToken to Studentinfo [HttpPost] Action Method in asp.net mvc cross site request forgery](/images/aspnet-mvc/add-validate-forgery-key-in-aspnet-mvc-cross-site-request.png)
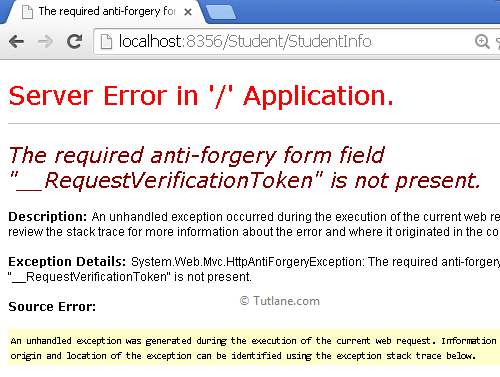
Now save the application and Run. If we are going to access our StudentInfo (http://localhost:8356/Student/StudentInfo) page from a browser, it will work properly as you can see below.
If we try to open the a.html page for posting data, it will fire an Error like (required anti-forgery form field "__RequestVerificationToken" is not present.).
This is how we can protect our application against Cross Site Request Forgery in asp.net mvc. Let’s check what actually happens beyond the seen.
When we add @Html.AntiForgeryToken() to a view, it adds unique value in the form of a Hidden Field and a session Cookie. To view a hidden field view source of StudentInfo view. Following is the hidden field in HTML which is generated.
<!-- Rendered HTML in the client browser -->
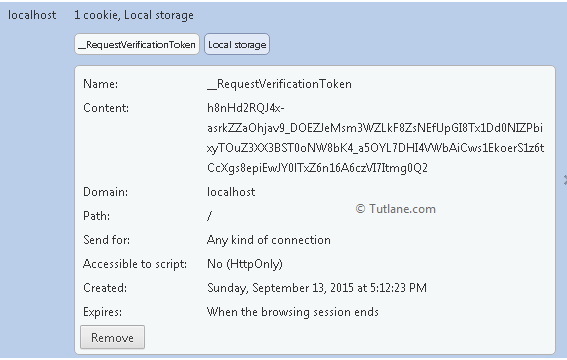
<input name="__RequestVerificationToken" type="hidden" value="vw4vaP7U2oQR7zWonY6JQHVPJ1vddp9qmUAJ2rTMbriexw54Eb5RcmzLmK9hsx2aPZD9WYkhgf9LKU3KXkehbK-DxlzZWs3wJQ7saMdy6nyZWvvD8CxS2bYHu-3iiIkyFkq9FLbJKcjwolrou-nCYsQ_vyL0VvIu2vsioTgZ12c1" />Following is the session which is created when we add AntiForgeryToken() to avoid cross site request forgery in asp.net mvc.
When we post StudentInfo form then ASP.NET MVC framework checks for a request forgery and also it check for __RequestVerificationToken Hidden field and __RequestVerificationToken Cookie are present or not. If either the cookie or the form field values are missing or the values don't match, ASP.NET MVC does not process the action. This is how we can prevent cross site request forgery attack in asp.net mvc.