Here we will learn membership provider in asp.net mvc, create users, roles using asp.net mvc membership, assign roles to users in asp.net mvc membership provider, remove users from roles in asp.net mvc membership, get all roles/users from asp.net mvc membership and implement security in asp.net mvc applications with examples.
To secure an application in asp.net mvc, we need to implement a security mechanism. By using the following methods in asp.net mvc, we can implement security in applications.
The most major part of any web application is to secure it and provide role-based access to users. For this, Microsoft has built-in Authentication & Authorization Mechanism called ASP .NET MVC Membership Provider. Here we will see what is authorization and authentication in asp.net mvc
Authentication: In simple words, we can say check whether the user is valid or not.
Authorization: It means permitting to access or deny particular resources or pages to users.
We will see how to create the database schema for Asp.net MVC Membership provider and that Registration of User and create Role and Assigning a role to Registered Users in asp.net mvc with demos.
Let’s create a simple application and learn how to implement asp.net mvc membership provider.
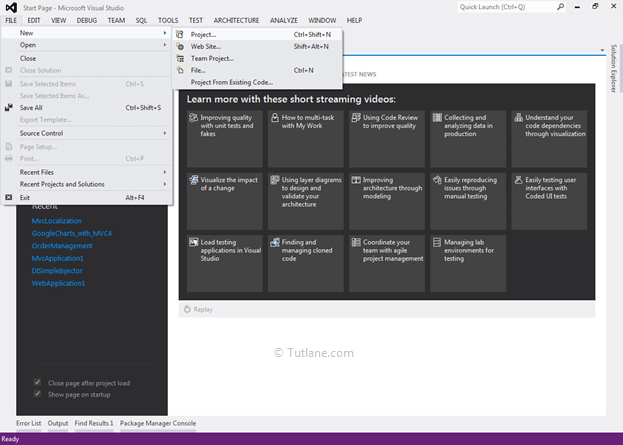
Let's start with creating a new asp.net mvc 4 application for that Open visual studio à Go to File à Select New à Select Project.
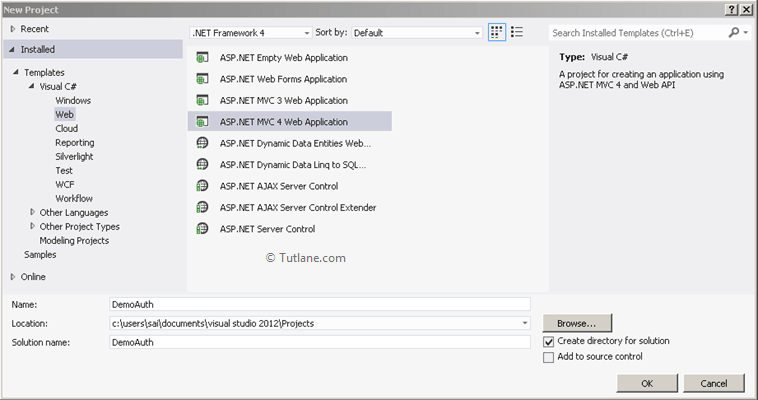
After that, you will see a new dialog for selecting your Template and Project type. From Templates, select Visual C# à inside that select Web and then project type select ASP.NET MVC 4 Web Application, and here we are giving the name as “DemoAuth” finally click on OK button.
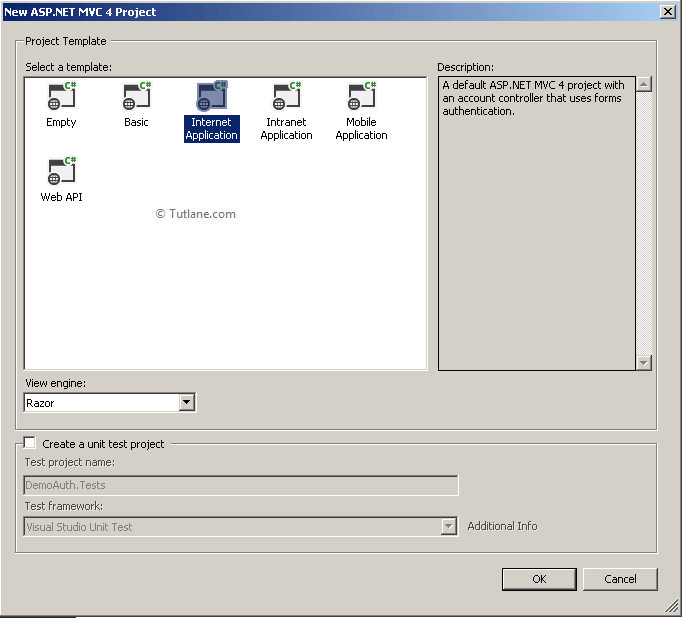
After naming and click on the OK button, now new dialog will pop up for selecting a template in that Select Internet Application template and set view engine as Razor. We are not going to create Unit testing for this project hence do not check this option and finally click OK like as shown below.
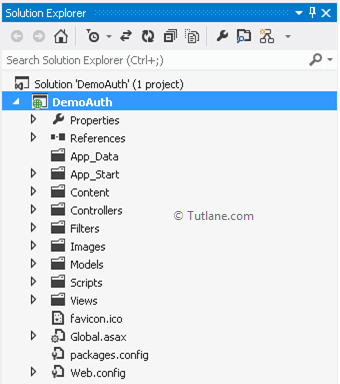
After click wait for some time, it requires some seconds for configuring the solution for you. After creating the project, our project will be ready, and it contains a lot of MVC folder structure and other script and .css style like as shown below.
After successfully creating applications now, let’s move towards creating Database.
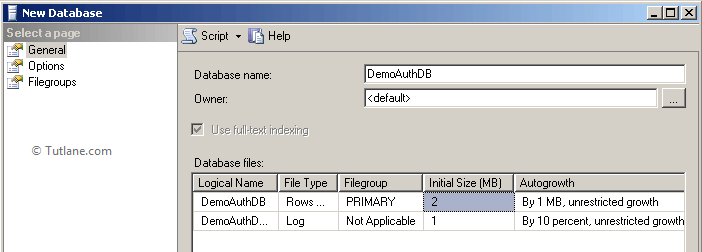
Now create a SQL Server database with any name, but we are naming it “DemoAuth”.
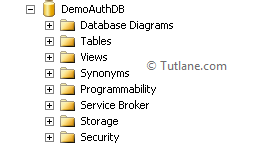
After creating a database that will be like, as shown below.
After creating a Database with the name “DemoAuth” add a connection string to the project.
<connectionStrings>
<add name="DBConnection" connectionString = "Data Source=sai-pc;Database=DemoAuth;UID=sa;Password=Pass$123" providerName="System.Data.SqlClient" />
</connectionStrings>
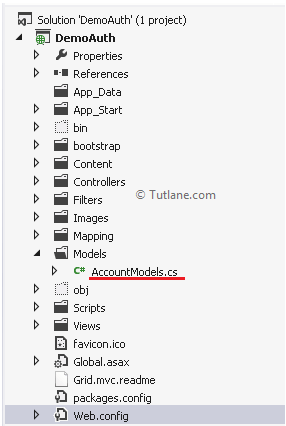
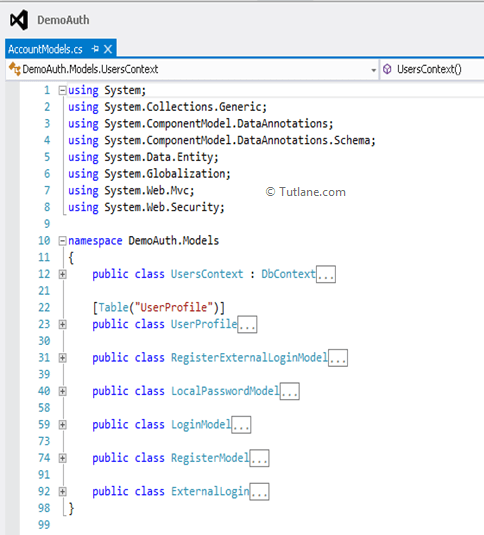
After adding the connection string now let's add Membership tables to the DemoAuth database. Before that let’s have look at model (AccountModels) and it's located in Models Folder which is created Default if you are choosing Internet Application Template that will be like as shown below.
AccountModels file will contain code like as shown below.
Here we are going to use the Code First Approach of Entity Framework. For adding Membership tables to the database, we need to add a single line of the following code in Global.asax.
WebSecurity.InitializeDatabaseConnection("DBConnection", "UserProfile", "UserId", "UserName", autoCreateTables: true);
The above line will create all Membership tables for this method, and we need to provide the parameters like as shown above. Following is the brief descript of the InitializeDatabaseConnection method
InitializeDatabaseConnection Method Metadata
public static void InitializeDatabaseConnection (string connectionStringName, string userTableName, string userIdColumn, string userNameColumn, bool autoCreateTables);
Parameters
The following are the parameters we used in the intializedatabaseconneciton method.
Once we add our database connection in our Global.asax file, that will be shown below.

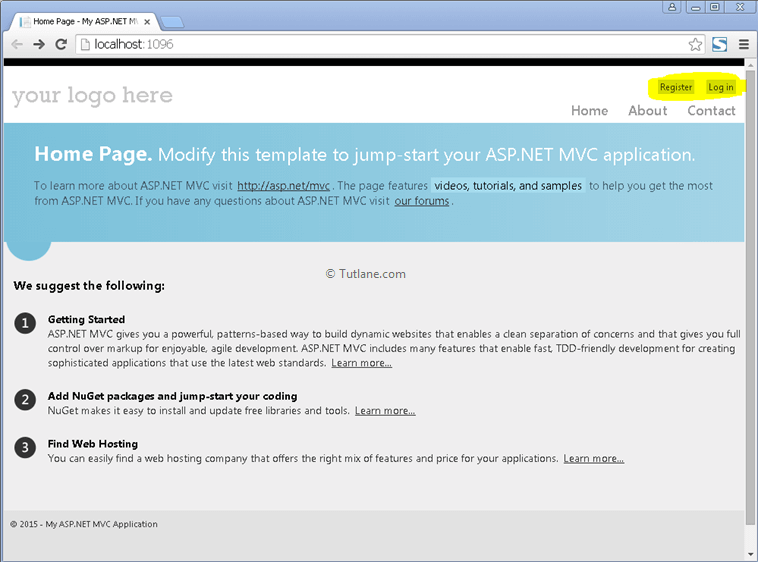
After completion of all configurations, let’s run the application and check. After running the application, you will find the Default homepage on that page at the right corner. You will find the register link, click on it, and wait for some time. The Register page will popup like as shown below.
After popping up on the Register page, we have looked at the database which we have created “DemoAuth” to expand the database, and inside the table, you will see all Membership Tables are created.

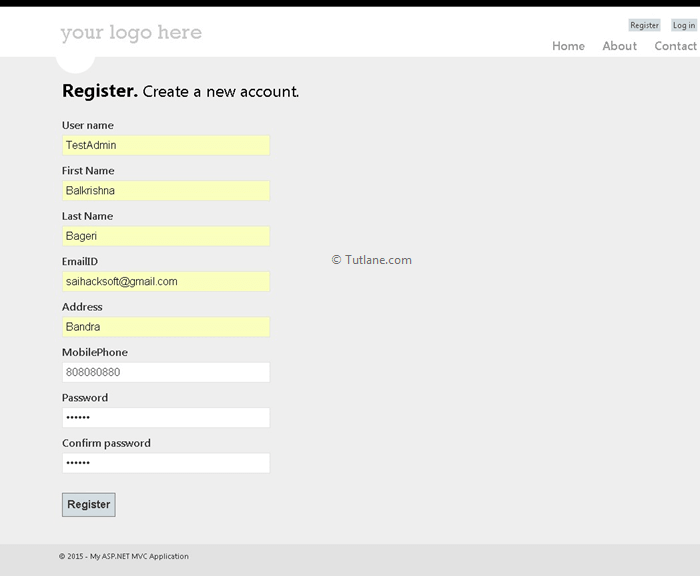
After clicking on the Register page, here is a view of it.

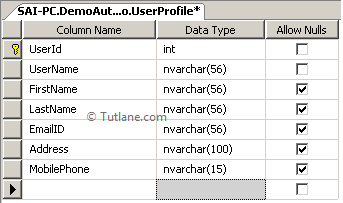
In this Register View, we only take few details while Registering User lets add some more fields such as FirstName, LastName, EmailID, Address, MobilePhone. For that, we need to add new columns in the “UserProfile” table.
After adding new columns in the UserProfile table, we need to make this change in RegisterModel. Register Model file will be located inside Account Models and Account Models created by Default if you are choosing Internet Application Template.
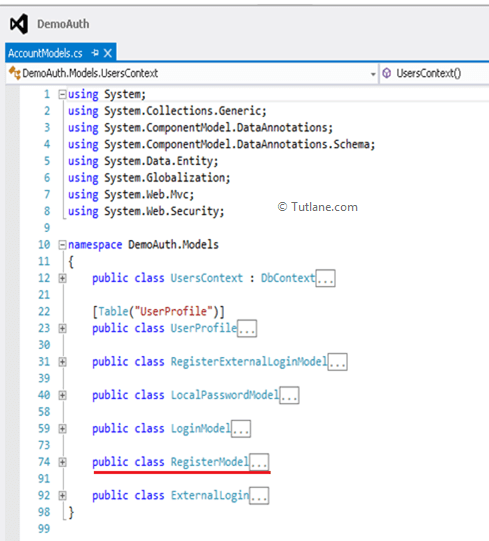
In this RegisterModel, we made changes to add properties to Register Model (FirstName, LastName, EmailID, Address, MobilePhone). After making modifications in RegisterModel that will contain code like as shown below.
public class RegisterModel
{
[Required]
[Display(Name = "User name")]
public string UserName { get; set; }
[Required]
[StringLength(100, ErrorMessage = "The {0} must be at least {2} characters long.",
MinimumLength = 6)]
[DataType(DataType.Password)]
[Display(Name = "Password")]
public string Password { get; set; }
[DataType(DataType.Password)]
[Display(Name = "Confirm password")]
[Compare("Password", ErrorMessage = "The password and confirmation password do not match.")]
public string ConfirmPassword { get; set; }
[Required]
[Display(Name = "First Name")]
public string FirstName { get; set; }
[Required]
[Display(Name = "Last Name")]
public string LastName { get; set; }
[Required]
[Display(Name = "EmailID")]
public string EmailID { get; set; }
[Required]
[Display(Name = "Address")]
public string Address { get; set; }
[Required]
[Display(Name = "MobilePhone")]
public string MobilePhone { get; set; }
}
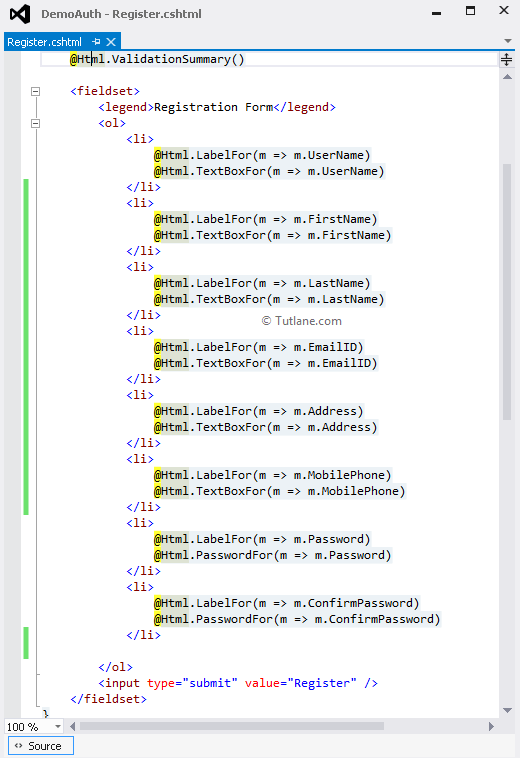
After doing these changes in RegisterModel, let's do changes similar Changes in Register View. In this Register View, we will add those fields added in RegisterModel, as shown below.
Now we completed doing changes with Model and View, only still the Controller part is remaining.
According to changes made in Register Model and Register View, we need to make changes in Register Action Method also.
Register Action Method is Located inside Account Controller, and we are going to make a change in the Register Action method, which handles [HttpPost] request. Let’s make changes to Register Action Method.
According to Old RegisterModel, we have the below line to Register User.
WebSecurity.CreateUserAndAccount(model.UserName, model.Password);
Now, we are going to add more Fields to it.
WebSecurity.CreateUserAndAccount(model.UserName, model.Password,
new
{
FirstName = model.FirstName,
LastName = model.LastName,
EmailID = model.EmailID,
Address = model.Address,
MobilePhone = model.MobilePhone
});
Complete code snippet for Register Action Method (Post).
[HttpPost]
[AllowAnonymous]
[ValidateAntiForgeryToken]
public ActionResult Register(RegisterModel model)
{
if (ModelState.IsValid)
{
// Attempt to register the user
try
{
WebSecurity.CreateUserAndAccount(model.UserName, model.Password,
new
{
FirstName = model.FirstName,
LastName = model.LastName,
EmailID = model.EmailID,
Address = model.Address,
MobilePhone = model.MobilePhone
});
WebSecurity.Login(model.UserName, model.Password);
return RedirectToAction("Index", "Home");
}
catch (MembershipCreateUserException e)
{
ModelState.AddModelError("", ErrorCodeToString(e.StatusCode));
}
}
// If we got this far, something failed, redisplay the form
return View(model);
}
After making changes, now run the application to register the user. Use the following format of URL like "http://localhost:2180/Account/Register" to view the new user registration form.
After Registering User, look at the database that will contain details we added in a table, as shown below.

After Registering User, now let’s move towards Creating Roles in asp.net mvc.
To create Roles, first, we need to add a Model with the name Role, and we are going to Add a Role Model inside Account Models, which is inside Models Folder.
[Table("webpages_Roles")]
public class Role
{
[Required(ErrorMessage = "Enter Role name")]
[StringLength(100, ErrorMessage = "The {0} must be at least {2} characters long.", MinimumLength = 6)]
public string RoleName { get; set; }
[Key]
[DatabaseGeneratedAttribute(DatabaseGeneratedOption.Identity)]
public int RoleId { get; set; }
}
After Creating the Model, now let’s add Action Method with Name “RoleCreate” for both Http Request in Account Controller.
[HttpGet]
public ActionResult RoleCreate()
{
return View(new Role());
}
[HttpPost]
public ActionResult RoleCreate(Role role)
{
return View(role);
}
After adding the RoleCreate Action Method, now let's Add View for RoleCreate Action Method.
Before adding View, build the application and then right-click inside RoleCreate Action Method and select Add View menu from the list after selecting new Dialog will popup with Dialog Name “Add View” then View the name of this View will be RoleCreate the name of Action Method inside which we have right-click to Add.
In View engine, we will set Razor as View engine, and in Model class, we will set Role as our Model for this View. In Scaffolding Template, we are going to select Create Template and finally set Use a layout or master page option by checking it like as shown below.
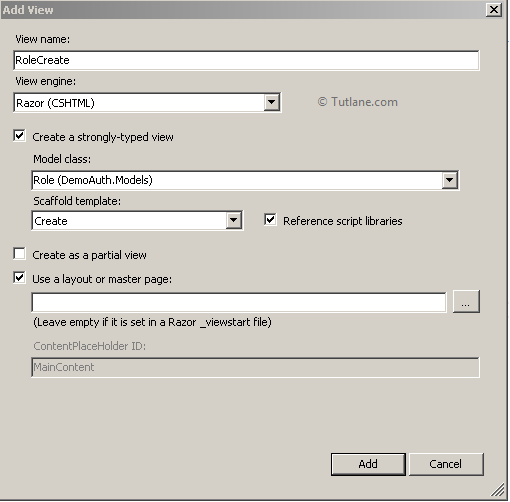
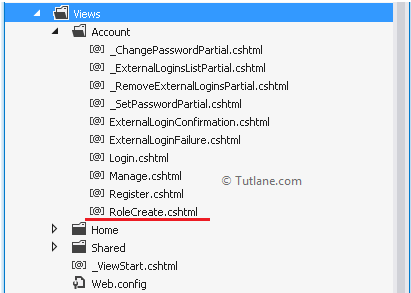
Finally, click on the Add View button. After clicking on this button, it will create a View in Account Folder with Name “RoleCreate”.
Now let’s run our application. You will see a login page and enter user details which we have created and then hit this URL "http://localhost:1096/Account/RoleCreate" then RoleCreate View will appear to be like as shown below.
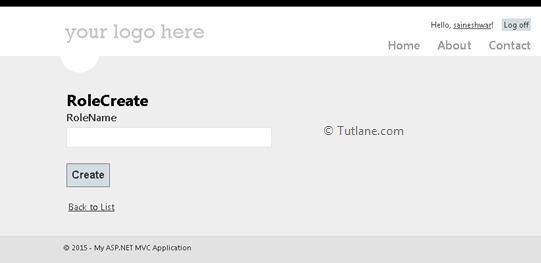
After appearing View, now we need to write code for Insert role in our Database for that we need to write Code for RoleCreate [HttpPost] Action Method. Inside this Action Method, we have a built-in method to check Roles exist or not [Roles.RoleExists(role.RoleName) ] this method return Boolean value if this Role name Exits then We are going show error Rolename already exists else we are going insert Role it into the database by using inbuilt Method [Roles.CreateRole(role.RoleName);].
Following is a code snippet of the RoleCreate [HttpPost] Method.
[HttpPost]
public ActionResult RoleCreate(Role role)
{
if (ModelState.IsValid)
{
if (Roles.RoleExists(role.RoleName))
{
ModelState.AddModelError("Error", "Rolename already exists");
return View(role);
}
else
{
Roles.CreateRole(role.RoleName);
return RedirectToAction("RoleIndex", "Account");
}
}
else
{
ModelState.AddModelError("Error", "Please enter Username and Password");
}
return View(role);
}
In the First Step, we created User, and in the Second Step, we created Roles. Now in the next step, let’s display all Roles which we have added.
To display all roles, we are going to use the Code First Approach. Let’s start using Code First Approach for that first, create a Class with the name UsersContext. This UsersContext class is created Default if you are choosing Internet Application, and it is located at Top Most in Account Models.
If you want to create manually, then below are steps to create it.
public class UsersContext
{
}
After Creating UsersContext class, now implement DBContext and DbSet to interact with the database and its operations. Here below is the code of DbContext class.
public class UsersContext : DbContext
{
public UsersContext(): base("DBConnection")
{
}
public DbSet<Role> Roles { get; set; }
}
DBConnection - Here it is a Name of Connection string in the Web.config file.
After Adding UsersContext, now let’s create an Action Method with Name DisplayAllRoles. In this Action Method, we are going to access all the roles which we have added. Here below is the code of the DisplayAllRoles Action Method which is located inside the Account Controller.
[HttpGet]
public ActionResult DisplayAllRoles()
{
return View();
}
Now let’s add logic to this Action Method for displaying all Roles.
[HttpGet]
public ActionResult DisplayAllRoles()
{
IEnumerable<Role> ListRoles;
using (UsersContext db = new UsersContext())
{
ListRoles = db.Roles.ToList();
}
return View(ListRoles);
}
Now we have completed the DisplayAllRoles Action Method part. Let’s add View with Name DisplayAllRoles. To add view, you need to right-click inside Action Method DisplayAllRoles after that, a new Dialog will Popup with Name Add View. Following is the snapshot of adding a view with properties.
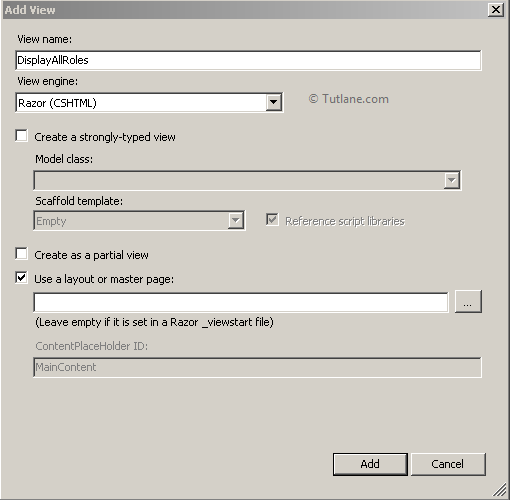
In the above dialog, the View Name will be similar to Action Method, and the View engine will be Razor by default. Here, we are selecting the Model manually, and we are going to Add Model namespace on view. Finally, just click on the Add button. After adding a blank View will appear now, we will display role for that we need the grid to display those roles for that we will Add Grid.MVC in this Project from Nuggets Package Manager.
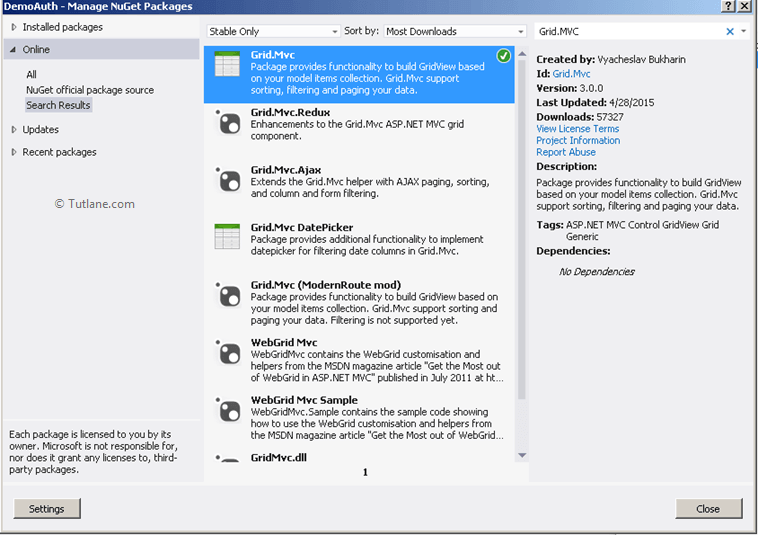
For Adding Grid.MVC just right click on Project and select Manage NuGet Packages
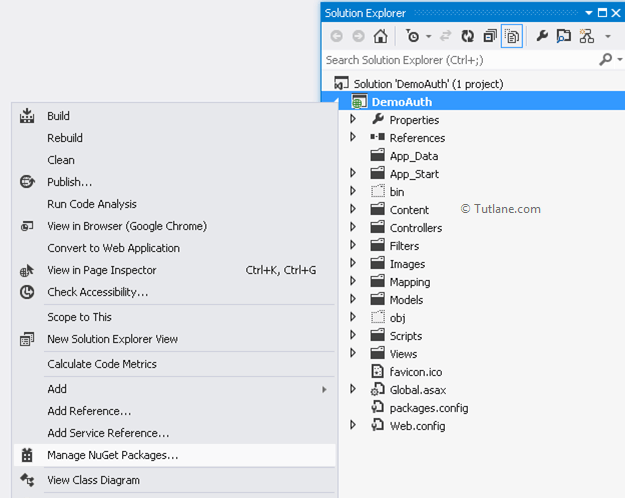
After clicking on Manage NuGet Packages, a new dialog will popup as shown below.
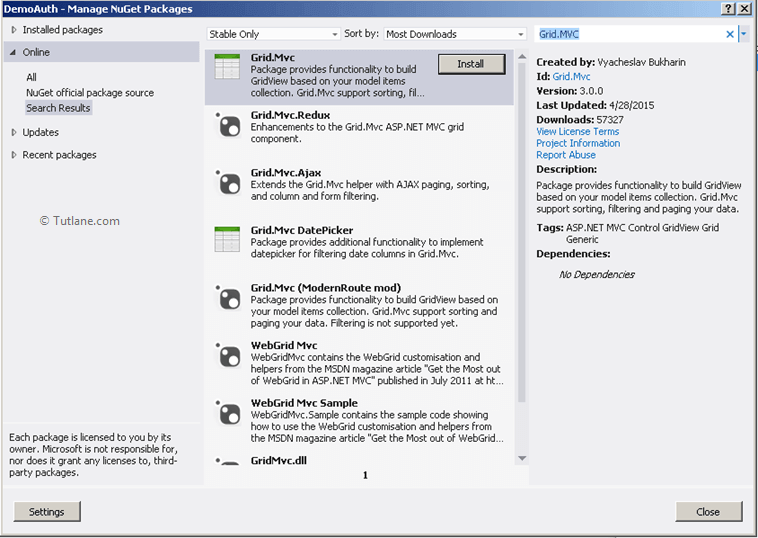
On the left side, the list selects an Online panel inside that selects Search Results. Now in the search box type Grid.MVC and click on the Install button. After installing, it will show Green symbols with Right Mark like as shown below.
After adding Grid MVC, let's move back to where we have left DisplayAllRoles View.
For this view, we will use model Role, and from Action Method, we are sending List of Role for that I will use IEnumerable<Role>.
Passing Model to View @model IEnumerable<DemoAuth.Models.Role>
For using Grid.MVC we need to add namespace @using GridMvc.Html
In Grid, we are going to display 2 Columns.
Following is the code snippet of DisplayAllRoles View
@model IEnumerable<DemoAuth.Models.Role>
@using GridMvc.Html
@{
ViewBag.Title = "DisplayAllRoles";
}
<h2>DisplayAllRoles</h2>
<link href="~/Content/Gridmvc.css" rel="stylesheet"/>
<link href="~/bootstrap/css/bootstrap.min.css" rel="stylesheet"/>
<script src="~/Scripts/jquery-1.9.1.min.js"></script>
<script src="~/Scripts/gridmvc.js"></script>
@Html.Grid(Model).Columns(columns =>
{
columns.Add(c => c.RoleId).Titled("Role ID");
columns.Add(c => c.RoleName).Titled("RoleName").Filterable(true);
}).WithPaging(10).Sortable(true)
Now let’s save application and run to access DisplayAllRoles View. To access use URL like "http://localhost:2180/Account/DisplayAllRoles" and it will display all the roles we added
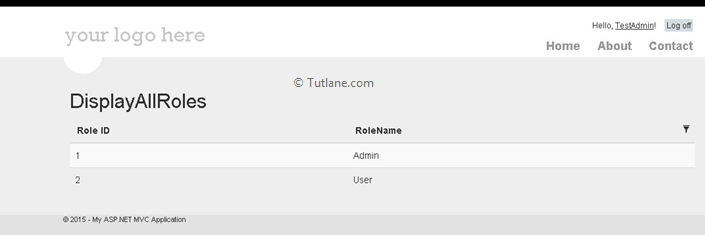
Finally, we displayed all Roles which we added now. Let's Move towards assigning these roles to the User.
For Assigning a role to Member, we first need to create a Model that will have MemberList and RoleList from this list, we will assign the role to Users. Let’s begin with Adding Model with Name AssignRoleVM. We are going to Add AssignRoleVM Model inside Account Models, which is inside Models Folder.
public class AssignRoleVM
{
[Required(ErrorMessage = " Select Role Name")]
public string RoleName { get; set; }
[Required(ErrorMessage = "Select UserName")]
public string UserID { get; set; }
public List<SelectListItem> Userlist { get; set; }
public List<SelectListItem> RolesList { get; set; }
}
After creating the Model, now let’s add New Action Method with Name RoleAddToUser inside Account Controller.
[HttpGet]
public ActionResult RoleAddToUser()
{
}
In this action Method, we will add MemberList and RoleList, which will be used on View to bind Dropdownlist.
Adding new DbSet in UserContext
We are going to add DbSet UserProfile inside UsersContext.
public DbSet<RegisterModel> UserProfile { get; set; }
In DBContext, we added a new DbSet UserProfile.
public class UsersContext : DbContext
{
public UsersContext()
: base("DBConnection")
{
}
public DbSet<Role> Roles { get; set; }
public DbSet<RegisterModel> UserProfile { get; set; }
}
Creating GetAll_Roles Method
We created GetAll_Roles Method for getting all Role from Database and returned RolesList, and this Method is created inside the Account Controller.
[NonAction]
public List<SelectListItem> GetAll_Roles()
{
List<SelectListItem> listrole = new List<SelectListItem>();
listrole.Add(new SelectListItem { Text = "select", Value = "0" });
using (UsersContext db = new UsersContext())
{
foreach (var item in db.Roles)
{
listrole.Add(new SelectListItem { Text = item.RoleName, Value = item.RoleName });
}
}
return listrole;
}
Creating GetAll_Users Method
We created GetAll_Users Method for getting all Users from Database and return Userlist, and this Method is created inside the Account Controller.
[NonAction]
public List<SelectListItem> GetAll_Users()
{
List<SelectListItem> listuser = new List<SelectListItem>();
listuser.Add(newSelectListItem { Text = "Select", Value = "0" });
using (UsersContext db = new UsersContext())
{
foreach (var item in db.UserProfile)
{
listuser.Add(new SelectListItem { Text = item.UserName, Value = item.UserName });
}
}
return listuser;
}
Assigning a value to AssignRoleVM Model
Now let’s assign this value to AssignRoleVM Model in RoleAddToUser Action Method.
[HttpGet]
public ActionResult RoleAddToUser()
{
AssignRoleVM objvm = new AssignRoleVM();
objvm.RolesList = GetAll_Roles();
objvm.Userlist = GetAll_Users();
return View(objvm);
}
After assigning Value, let’s add A View. To add view, you need to right Click inside Action Method RoleAddToUser a new Dialog will Popup with Name Add View.
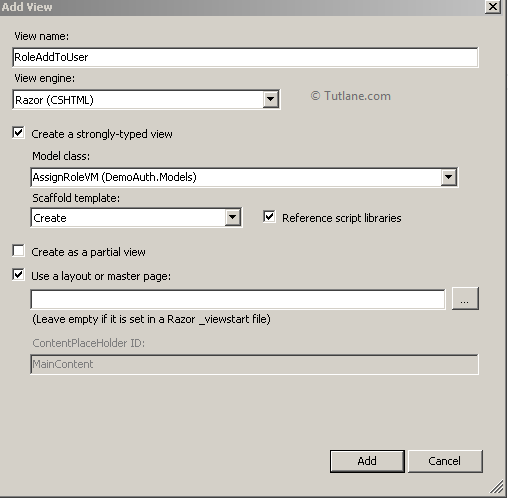
In the above image, the View Name will be similar to Action Method, and the View engine will be Razor default. For now, we are going to select AssignRoleVM Model. After that, in the scaffold template, we will select Create Template and finally click on the Add button.
After adding, it will create a View with Name the same as Action Method (RoleAddToUser), but in this view, we have to make a change by changing the default code and add DropdownList.
Here is the code of (RoleAddToUser View) in which we added DropdownList by removing textboxes generated by Create Template. Following is the Code snippet of RoleAddtoUser View.
@model DemoAuth.Models.AssignRoleVM
@{
ViewBag.Title = "RoleAddToUser";
}
<h2>RoleAddToUser</h2>
<link href="~/bootstrap/css/bootstrap.min.css" rel="stylesheet"/>
<script src="~/bootstrap/js/bootstrap.min.js"></script>
@using (Html.BeginForm())
{
@Html.ValidationSummary(true)
@Html.AntiForgeryToken()
<div>
@ViewBag.ResultMessage
</div>
<fieldset>
<legend>AssignRoleVM</legend>
<div class="editor-label">
@Html.LabelFor(model => model.RoleName)
</div>
<div class="editor-field">
@Html.DropDownListFor(m => m.RoleName, new SelectList(Model.RolesList, "Value", "Text"),
new { style = "width:200px", @class = "form-control" })
@Html.ValidationMessageFor(model => model.RoleName)
</div>
<div class="editor-label">
@Html.LabelFor(model => model.UserID)
</div>
<div class="editor-field">
@Html.DropDownListFor(m => m.UserID, new SelectList(Model.Userlist, "Value", "Text"),
new { style = "width:200px", @class = "form-control" })
@Html.ValidationMessageFor(model => model.UserID)
</div>
<br/>
<p>
<input type="submit" value="Assign"/>
</p>
</fieldset>
}
<div>
@Html.ActionLink("Back to List", "Index")
</div>
@section Scripts {
@Scripts.Render("~/bundles/jqueryval")
}
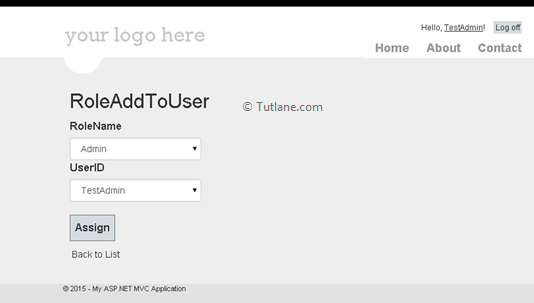
Following is the snapshot after adding DropdownList to RoleAddToUser View. To access view, we need to use a URL like " http://localhost:2180/Account/RoleAddToUser".
After completing the rendering part, let’s work on its [HttpPost] Request Part of RoleAddToUser Action Method. Let's Add New Action Method with Name RoleAddToUser with [HttpPost] Request, which will take the AssignRoleVM Model as input to this Action Method.
RoleAddToUser Action Method
We are going to add RoleAddtoUser Action Method inside Account Controller.
[HttpPost]
[ValidateAntiForgeryToken]
public ActionResult RoleAddToUser(AssignRoleVM objvm)
{
}
After adding Action Method further, we will add validation and Assigning a role to User logic in this Action Method.
Validation inside RoleAddtoUser ActionMethod
First validation to check both dropdownlists are select or not.
if (objvm.RoleName == "0")
{
ModelState.AddModelError("RoleName", "Please select RoleName");
}
if (objvm.UserID == "0")
{
ModelState.AddModelError("UserName", "Please select Username");
}
Second validation to check whether any role is assigned to the User.
Creating a Model of webpages_UsersInRoles table
For that, we need to add a new Model for the Existing table (webpages_UsersInRoles). We are going to add webpages_UsersInRoles Model inside Account Models, which is inside Models Folder.
[Table("webpages_UsersInRoles")]
public class webpages_UsersInRoles
{
[Key]
[DatabaseGeneratedAttribute(DatabaseGeneratedOption.Identity)]
public int UserId { get; set; }
public int RoleId { get; set; }
}
Adding webpages_UsersInRole DbSet in DBContext
We are going to add DbSet webpages_UsersInRole inside UsersContext.
public DbSet<webpages_UsersInRoles> webpages_UsersInRole { get; set; }
Method for checking whether any role is assigned to User
After adding the model, let's check whether any role is assigned to the User. If yes, then the count will be greater than one else it will be Zero (0).
public bool Get_CheckUserRoles(int UserId)
{
using (UsersContext context = newUsersContext())
{
var data = (from WR in context.webpages_UsersInRole
join R in context.Roles on WR.RoleId equals R.RoleId
where WR.UserId == UserId
orderby R.RoleId
select new
{
WR.UserId
}).Count();
if (data > 0)
{
return true;
}
else
{
return false;
}
}
}
Now we have created the Get_CheckUserRoles method, and we are going to call this method before assigning a role to use.
if (Get_CheckUserRoles(Convert.ToInt32(objvm.UserID)) == true)
{
ViewBag.ResultMessage = "This user already has the role specified !";
}
else
{
var UserName = GetUserName_BY_UserID(Convert.ToInt32(objvm.UserID));
Roles.AddUserToRole(UserName, objvm.RoleName);
ViewBag.ResultMessage = "Username added to the role successfully !";
}
In the above condition, the user does not exist, then we will assign roles to this User. Before assigning User to the role, we are getting UserName by UserID.
Method for getting UserName by UserID
Here we Created GetUserName_BY_UserID Method for getting User names from UserID, and this Method is created inside Account Controller.
public string GetUserName_BY_UserID(int UserId)
{
using (UsersContext context = newUsersContext())
{
var UserName = (from UP in context.UserProfile
where UP.UserId == UserId
select UP.UserName).SingleOrDefault();
return UserName;
}
}
After explaining the method used, now let's Merge in Action Method.
Code snippet for RoleAddToUser Action Method
[HttpPost]
[ValidateAntiForgeryToken]
public ActionResult RoleAddToUser(AssignRoleVM objvm)
{
if (objvm.RoleName == "0")
{
ModelState.AddModelError("RoleName", "Please select RoleName");
}
if (objvm.UserID == "0")
{
ModelState.AddModelError("UserName", "Please select Username");
}
if (ModelState.IsValid)
{
if (Get_CheckUserRoles(Convert.ToInt32(objvm.UserID)) == true)
{
ViewBag.ResultMessage = "This user already has the role specified !";
}
else
{
var UserName = GetUserName_BY_UserID(Convert.ToInt32(objvm.UserID));
Roles.AddUserToRole(UserName, objvm.RoleName);
ViewBag.ResultMessage = "Username added to the role successfully !";
}
objvm.RolesList = GetAll_Roles();
objvm.Userlist = GetAll_Users();
return View(objvm);
}
else
{
objvm.RolesList = GetAll_Roles();
objvm.Userlist = GetAll_Users();
}
return View(objvm);
}
Now run the application and access this page. You first need to login then access URL "http://localhost:2180/Account/RoleAddToUser".
After entering the URL, you will find RoleAddToUser View on this view, we have one dropdown for Users, and another is for Roles select User and Roles and click on the Assign button if User does not have any role then it will allow assigning role else it will show an alert message.
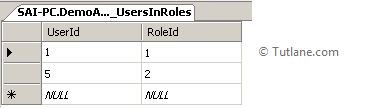
After assigning value now, let’s look at the table where values of a role assigned are stored. These values will be stored in webpages_UsersInRoles table.
Now we completed part of Role assigning to User, let's create a new screen for displaying which role is assigned to which User.
Creating View AllroleandUser
In this view, we will display role and user name for that we created a model with Name AllroleandUser. This Model will be added inside Account Models that are inside Models Folder.
public class AllroleandUser
{
public string RoleName { get; set; }
public string UserName { get; set; }
public IEnumerable<AllroleandUser> AllDetailsUserlist { get; set; }
}
After adding Model next step, we will add Action Method with the name “DisplayAllUserroles” this will be only for [HttpGet] Request.
[HttpGet]
public ActionResult DisplayAllUserroles()
{
}
After adding DisplayAllUserroles Action Method Now we will write Linq query to get UserName and RoleName
[NonAction]
public List<AllroleandUser> Get_Username_And_Rolename()
{
using (UsersContext db = newUsersContext())
{
var Alldata = (from User in db.UserProfile
join WU in db.webpages_UsersInRole on User.UserId equals WU.UserId
join WR in db.Roles on WU.RoleId equals WR.RoleId
select new AllroleandUser { UserName = User.UserName, RoleName= WR.RoleName }).ToList();
return Alldata;
}
}
The above Linq query will return the UserName and RoleName of all Users registered to whom Role are assigned. In the next step, we will access this Method in DisplayAllUserroles Action Method and assign value to IEnumerable<AllroleandUser> model List. Following is the code snippet for DisplayAllUserroles Action Method inside Account Controller.
[HttpGet]
public ActionResult DisplayAllUserroles()
{
AllroleandUser objru = new AllroleandUser();
objru.AllDetailsUserlist = Get_Username_And_Rolename();
return View(objru);
}
After completing assigning value within DisplayAllUserroles Action Method, now let’s add View. For adding the view, you just need to right Click inside Action Method DisplayAllUserroles a new Dialog will Popup with Name Add View like as shown below.
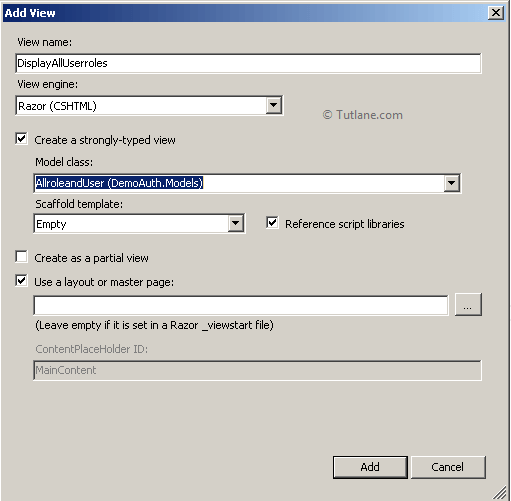
In the above image, the View Name will be similar to Action Method, then the View engine will be Razor default. For now, we are going to select AllroleandUser Model.and in the scaffold template, we are going to select Empty Template and finally click on the Add button.
After clicking on the add button, a Blank View with the selected model namespace will be seen. Now in this View, we are going to display UserName and RoleName of all Users using Grid.MVC.
@model DemoAuth.Models.AllroleandUser
@using GridMvc.Html
@{
ViewBag.Title = "DisplayAllUserroles";
}
<h2>DisplayAllUserroles</h2>
<link href="~/Content/Gridmvc.css" rel="stylesheet"/>
<link href="~/bootstrap/css/bootstrap.min.css" rel="stylesheet"/>
<script src="~/Scripts/jquery-1.9.1.min.js"></script>
<script src="~/Scripts/gridmvc.js"></script>
@Html.Grid(Model.AllDetailsUserlist).Columns(columns =>
{
columns.Add(c => c.UserName).Titled("UserName").Filterable(true);
columns.Add(c => c.RoleName).Titled("RoleName").Filterable(true);
}).WithPaging(10).Sortable(true)
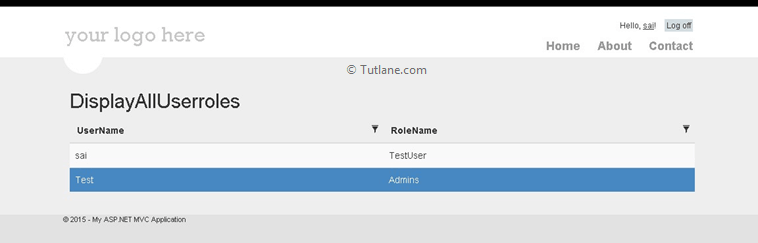
Now run DisplayAllUserroles View using url like "http://localhost:2180/Account/DisplayAllUserroles".
Finally, after displaying All User roles and names now, let’s remove from the next step's role. It will be similar to allocating Role to User.
Now let’s start with Creating Last View Remove Role from User. In this Action Method, we will remove Role from User to whom we have allocated Role. The View for this Action Method will be similar to RoleAddToUser View. In this view, we will see 2 dropdownlist one for User, and another will be for Role.
Adding Action Method with Name RemoveRoleAddedToUser in this Action Method, we will use the same model (AssignRoleVM), which we have already used for RoleAddToUser. In [HttpGet] request, we are going to fill both the dropdownlist of User and Role.
Following is the code snippet to add RemoveRoleAddedToUser Action Method inside Account Controller.
[HttpGet]
public ActionResult RemoveRoleAddedToUser()
{
AssignRoleVM objvm = new AssignRoleVM();
objvm.RolesList = GetAll_Roles();
objvm.Userlist = GetAll_Users();
return View(objvm);
}
After creating Action Method RemoveRoleAddedToUser for handling [HttpGet] request now we are going to add another Action Method with similar name RemoveRoleAddedToUser for handling [HttpPost] request and this Action Method will have AssignRoleVM Model as Input Parameter.
Now we are going to add the RemoveRoleAddedToUser Action Method inside the Account Controller.
[HttpPost]
[ValidateAntiForgeryToken]
public ActionResult RemoveRoleAddedToUser(AssignRoleVM objvm)
{
return View();
}
After adding the Action Method, we are going to add logic and Validation to it. First thing, let’s check whether the user existing in the role or not. For checking user existence, we have created a method that takes UserID as input and check whether User exists or not, and returns the Boolean value as output.
If the user exists in the role, we will remove the user's role using the inbuilt Membership method [ Roles.RemoveUserFromRole ] for this method, we need to pass to 2 parameters, first UserName and second RoleName like as shown below
Roles.RemoveUserFromRole(UserName, objvm.RoleName);
Following is the code snippet to check whether the user exists in the role or not.
if (Get_CheckUserRoles(Convert.ToInt32(objvm.UserID)) == true)
{
var UserName = GetUserName_BY_UserID(Convert.ToInt32(objvm.UserID));
Roles.RemoveUserFromRole(UserName, objvm.RoleName);
ViewBag.ResultMessage = "Role removed from this user successfully !";
}
else
{
ViewBag.ResultMessage = "This user doesn't belong to selected role.";
}
In the above code, we are going to check if the user to whom we are assigning roles is already in the role or not. If he is in the role, then we will execute if part of the code in that we will remove the role of User and show Message [ViewBag.ResultMessage = "Role removed from this user successfully !";] else, if User is not in the role, then we are going to execute else part of code and going to show Message, e.g. [ViewBag.ResultMessage = "This user doesn't belong to selected role."; ]. Following is the code snippet of the RemoveRoleAddedToUser Action Method.
[HttpPost]
[ValidateAntiForgeryToken]
public ActionResult RemoveRoleAddedToUser(AssignRoleVM objvm)
{
if (objvm.RoleName == "0")
{
ModelState.AddModelError("RoleName", "Please select RoleName");
}
if (objvm.UserID == "0")
{
ModelState.AddModelError("UserName", "Please select Username");
}
if (ModelState.IsValid)
{
if (Get_CheckUserRoles(Convert.ToInt32(objvm.UserID)) == true)
{
var UserName = GetUserName_BY_UserID(Convert.ToInt32(objvm.UserID));
Roles.RemoveUserFromRole(UserName, objvm.RoleName);
ViewBag.ResultMessage = "Role removed from this user successfully !";
}
else
{
ViewBag.ResultMessage = "This user doesn't belong to selected role.";
}
objvm.RolesList = GetAll_Roles();
objvm.Userlist = GetAll_Users();
}
else
{
objvm.RolesList = GetAll_Roles();
objvm.Userlist = GetAll_Users();
}
return View(objvm);
}
After creating the Action Method, now we are going to Add View (RemoveRoleAddedToUser). For adding view, you just need to right Click inside Action Method RemoveRoleAddedToUser a new Dialog will Popup with Name Add View. Following is the snapshot of RemoveRoleAddedToUser View.
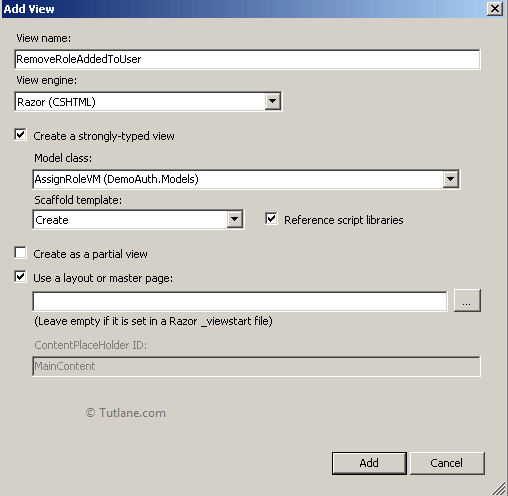
In the above dialog, the View Name will be similar to Action Method, and the View engine will be Razor default. For now, we are going to select AssignRoleVM Model. After that, in the scaffold template, we will select Create Template and finally click on the Add button.
After adding, it will create a View with Name the same as Action Method (RemoveRoleAddedToUser), but in this view, we have to make a change by changing default code and add DropdownList. Here is the code of (RemoveRoleAddedToUser View) in which we added DropdownList by removing textboxes generated by Create Template. Following is the code snippet of RemoveRoleAddedToUser View.
@model DemoAuth.Models.AssignRoleVM
@{
ViewBag.Title = "RoleAddToUser";
}
<h2>RoleAddToUser</h2>
<link href="~/bootstrap/css/bootstrap.min.css" rel="stylesheet"/>
<script src="~/bootstrap/js/bootstrap.min.js"></script>
@using (Html.BeginForm())
{
@Html.ValidationSummary(true)
@Html.AntiForgeryToken()
<div>
@ViewBag.ResultMessage
</div>
<fieldset>
<legend>AssignRoleVM</legend>
<div class="editor-label">
@Html.LabelFor(model => model.RoleName)
</div>
<div class="editor-field">
@Html.DropDownListFor(m => m.RoleName, newSelectList(Model.RolesList, "Value", "Text"),
new { style = "width:200px", @class = "form-control" })
@Html.ValidationMessageFor(model => model.RoleName)
</div>
<div class="editor-label">
@Html.LabelFor(model => model.UserID)
</div>
<div class="editor-field">
@Html.DropDownListFor(m => m.UserID, newSelectList(Model.Userlist, "Value", "Text"),
new { style = "width:200px", @class = "form-control" })
@Html.ValidationMessageFor(model => model.UserID)
</div>
<br/>
<p>
<input type="submit" value="Remove Role"/>
</p>
</fieldset>
}
<div>
@Html.ActionLink("Back to List", "Index")
</div>
@section Scripts {
@Scripts.Render("~/bundles/jqueryval")
}
Now access run application and access RemoveRoleAddedToUser View using URL like "http://localhost:2180/Account/RemoveRoleAddedToUser".

If you want to authorize the entire Controller, then Apply [Authorize] Attribute to Controller and if you want only for some action Method, then apply to Action Method only. Let's check out [Authorize] Attribute with Controller. For that, we are going to add 2 Controller for Demo.
Adding Controller
To add controller, right-click on Controller Folder select Add à then select Controller. As you select controller, a new dialog will popup Add Controller.
After this, let's give the Name to Controller “Demo1Controller”. In the template, we will not select any template for selecting the “Empty MVC controller” then click on Add Button.
After creating controller For Demo1Controller, I have added [Authorize] Attribute to the entire Controller if the user has the role of “Admin” can only access this controller else it will redirect Login Page.
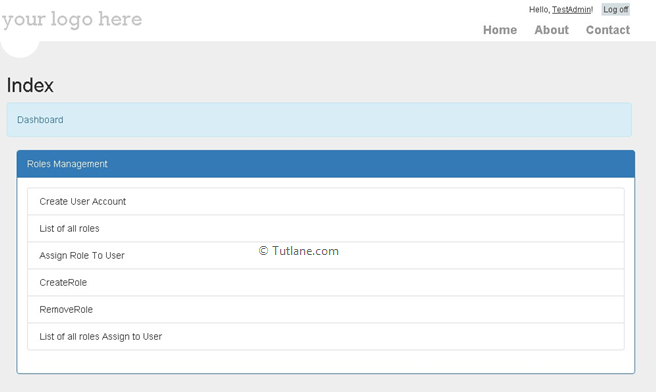
In this example we showed Authorize Attribute with Rolename [Authorize(Roles="Admin")] if you want to Authorize Attribute with Username then you need to use Users [Authorize(Users = "TestAdmin")].
using System;
using System.Collections.Generic;
using System.Linq;
using System.Web;
using System.Web.Mvc;
namespace DemoAuth.Controllers
{
[Authorize(Roles="Admin")]
public class Demo1Controller : Controller
{
public ActionResult Index()
{
return View();
}
}
}
Now we will add a new controller for that right-click on Controller Folder select Add à then select Controller. As you select controller, a new dialog will popup Add Controller.
After this, let's give the Name to Controller “Demo2Controller”.In the template, we will not select any template for selecting the “Empty MVC controller” then click on Add Button.
After creating a controller for Demo2Controller, we added [Authorize] Attribute to Action Method. If a user has the role of “Admin” can only access this Action Method else, it will redirect to Login Page.
using System;
using System.Collections.Generic;
using System.Linq;
using System.Web;
using System.Web.Mvc;
namespace DemoAuth.Controllers
{
public class Demo2Controller: Controller
{
[Authorize(Roles = "Admin")]
public ActionResult Index()
{
return View();
}
}
}
Last, if you want to Use Authorize Attribute with both Rolename and Username combinations, you can do it in the following way. This role must be “Admin” and the login Username must be “TestAdmin” then only he can access this Action Method. E.g [Authorize(Roles = "Admin", Users = "TestAdmin")].
using System;
using System.Collections.Generic;
using System.Linq;
using System.Web;
using System.Web.Mvc;
namespace DemoAuth.Controllers
{
public class Demo2Controller: Controller
{
//
// GET: /Demo2/
[Authorize(Roles = "Admin", Users = "TestAdmin")]
public ActionResult Index()
{
return View();
}
}
}
Finally, the View which we have created.
The following are the links of asp.net mvc membership.