Here we will learn how to create a asp.net MVC 4 CRUD operation using ADO.NET. We have already learnt how to create CRUD operations Using ADO.NET Entity Framework but if you have an application frequently doing database transaction then using ADO.NET will be best for your application.
Before start creating application let's have a look on database part first. We are going to use Customer table for performing CRUD Operation. Here is Customer table view
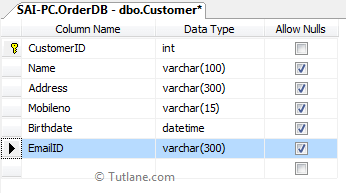
CREATE TABLE [dbo].[Customer]
(
[CustomerID] [int] NOT NULL Primary key,
[Name] [varchar](100) NULL,
[Address] [varchar](300) NULL,
[Mobileno] [varchar](15) NULL,
[Birthdate] [datetime] NULL,
[EmailID] [varchar](300) NULL,
)
CREATE PROCEDURE Usp_InsertUpdateDelete_Customer
@CustomerID BIGINT = 0
,@Name NVARCHAR(100) = NULL
,@Mobileno NVARCHAR(15) = NULL
,@Address NVARCHAR(300) = 0
,@Birthdate DATETIME = NULL
,@EmailID NVARCHAR(15) = NULL
,@Query INT
AS
BEGIN
IF (@Query = 1)
BEGIN
INSERT INTO Customer(
NAME
,Address
,Mobileno
,Birthdate
,EmailID
)
VALUES (
@Name
,@Address
,@Mobileno
,@Birthdate
,@EmailID
)
IF (@@ROWCOUNT > 0)
BEGIN
SELECT 'Insert'
END
END
IF (@Query = 2)
BEGIN
UPDATE Customer
SET NAME = @Name
,Address = @Address
,Mobileno = @Mobileno
,Birthdate = @Birthdate
,EmailID = @EmailID
WHERE Customer.CustomerID = @CustomerID
SELECT 'Update'
END
IF (@Query = 3)
BEGIN
DELETE
FROM Customer
WHERE Customer.CustomerID = @CustomerID
SELECT 'Deleted'
END
IF (@Query = 4)
BEGIN
SELECT *
FROM Customer
END
END
IF (@Query = 5)
BEGIN
SELECT *
FROM Customer
WHERE Customer.CustomerID = @CustomerID
END
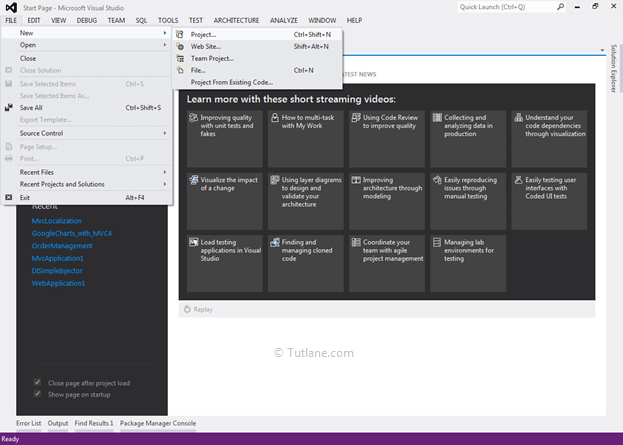
Let’s start with creating asp.net Mvc application and naming it as "Tutorial7ADO". Now Open visual studio studio àGo to File àSelect New àSelect Project like as shown below
After that you will see new dialog will pop up for selecting your Template and Project type. From Templates select Visual C# àinside that select Web and then project type select ASP.NET MVC 4 Web Application and here we are giving name as “Tutorial7ADO” then finally click on OK button.
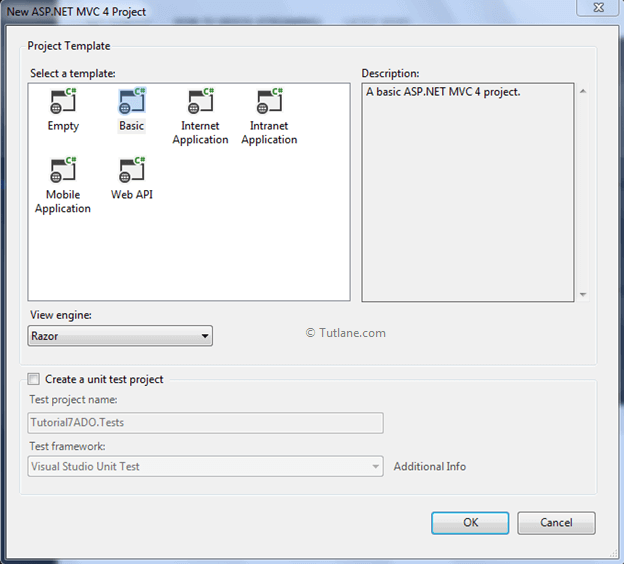
Now a New ASP.NET MVC 4 Project dialog will appear from that select Basic Template and from view engine: select Razor and click ok button like as shown below
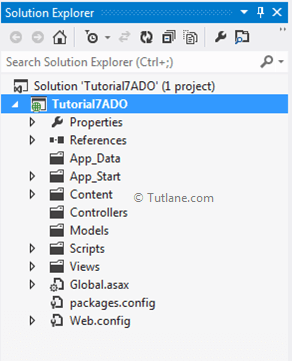
After this our basic MVC application has been created that would be like as shown below
After create application now let's add Model
For adding Model Right click on Models folder àselect Add à then select Class. After that a new Dialog (Add New Item) will popup asking you to enter Class name “Customer” like as shown below
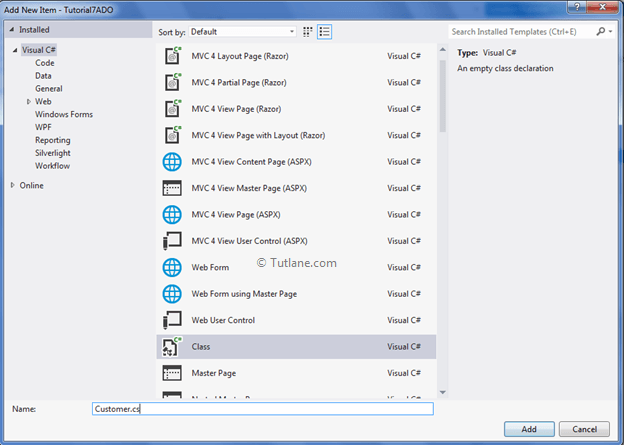
Our Customermodel Code snippet will be like as shown below
using System;
using System.Collections.Generic;
using System.Linq;
using System.Web;
namespace Tutorial7ADO.Models
{
public class Customer
{
public int CustomerID { get; set; }
public string Name { get; set; }
public string Address { get; set; }
public string Mobileno { get; set; }
public DateTime Birthdate { get; set; }
public string EmailID { get; set; }
public List<Customer> ShowallCustomer { get; set; }
}
}
In this Model we will declare Properties and Validation (DataAnnotations)
using System;
using System.Collections.Generic;
using System.ComponentModel.DataAnnotations;
using System.Linq;
using System.Web;
namespace Tutorial7ADO.Models
{
public class Customer
{
[Key]
public int CustomerID { get; set; }
[Required(ErrorMessage = "Enter Name")]
public string Name { get; set; }
[Required(ErrorMessage = "Enter Address")]
public string Address { get; set; }
[Required(ErrorMessage = "Enter Mobileno")]
public string Mobileno { get; set; }
[DataType(DataType.Date)]
[Required(ErrorMessage = "Enter Birthdate")]
public DateTime Birthdate { get; set; }
[Required(ErrorMessage = "Enter EmailID")]
public string EmailID { get; set; }
}
}
We have completed creating the Model. Let's start adding the controller
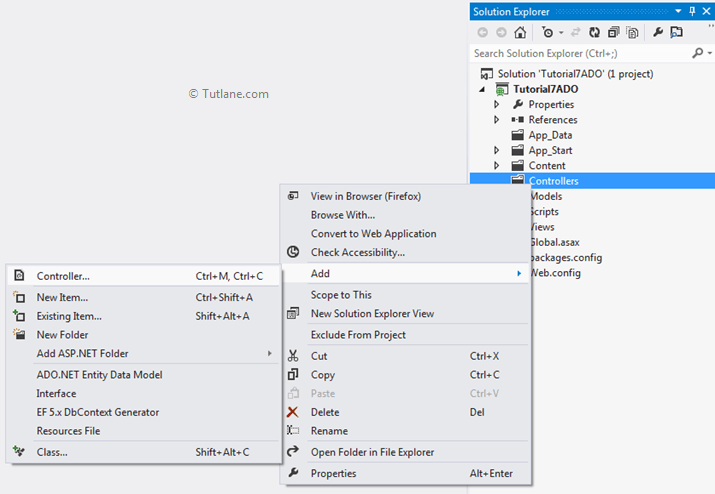
Select Controller a new Window will then pop up asking for the Controller name. In that provide name as Default1Controller and click on the Add button to add it.
Now we will add a folder and class for accessing a Database Connection and doing the inserting, updating and deleting. The following image shows the added folder name DataAccess
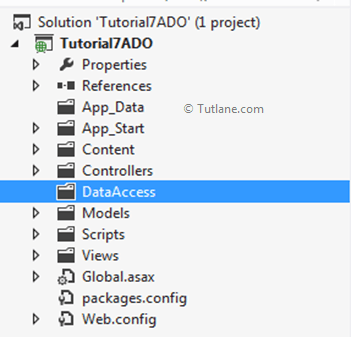
Right-click on the DataAccess folder and select add class then provide the class the name DataAccessLayer.cs
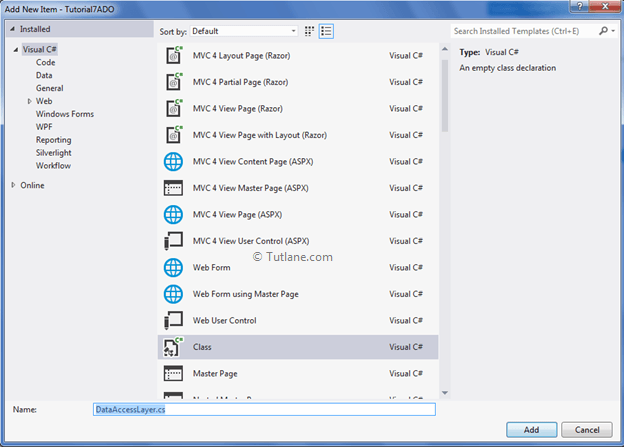
After adding our DataAccessLayer will contain code like as shown below
using System;
using System.Collections.Generic;
using System.Linq;
using System.Web;
namespace Tutorial7ADO.DataAccess
{
public class DataAccessLayer
{
}
}
Now inside this we are going to write all Database operation. Let’s start with first operation Insert Record below is code for it
public string InsertData(Customer objcust)
{
SqlConnection con = null;
string result = "";
try
{
con = new SqlConnection(ConfigurationManager.ConnectionStrings["mycon"].ToString());
SqlCommand cmd = new SqlCommand("Usp_InsertUpdateDelete_Customer", con);
cmd.CommandType = CommandType.StoredProcedure;
cmd.Parameters.AddWithValue("@CustomerID", 0);
cmd.Parameters.AddWithValue("@Name", objcust.Name);
cmd.Parameters.AddWithValue("@Address", objcust.Address);
cmd.Parameters.AddWithValue("@Mobileno", objcust.Mobileno);
cmd.Parameters.AddWithValue("@Birthdate", objcust.Birthdate);
cmd.Parameters.AddWithValue("@EmailID", objcust.EmailID);
cmd.Parameters.AddWithValue("@Query", 1);
con.Open();
result = cmd.ExecuteScalar().ToString();
return result;
}
catch
{
return result = "";
}
finally
{
con.Close();
}
}
The Second operation will be Update Record below is code for it
public string UpdateData(Customer objcust)
{
SqlConnection con = null;
string result = "";
try
{
con = new SqlConnection(ConfigurationManager.ConnectionStrings["mycon"].ToString());
SqlCommand cmd = new SqlCommand("Usp_InsertUpdateDelete_Customer", con);
cmd.CommandType = CommandType.StoredProcedure;
cmd.Parameters.AddWithValue("@CustomerID", objcust.CustomerID);
cmd.Parameters.AddWithValue("@Name", objcust.Name);
cmd.Parameters.AddWithValue("@Address", objcust.Address);
cmd.Parameters.AddWithValue("@Mobileno", objcust.Mobileno);
cmd.Parameters.AddWithValue("@Birthdate", objcust.Birthdate);
cmd.Parameters.AddWithValue("@EmailID", objcust.EmailID);
cmd.Parameters.AddWithValue("@Query", 2);
con.Open();
result = cmd.ExecuteScalar().ToString();
return result;
}
catch
{
return result = "";
}
finally
{
con.Close();
}
}
The third operation will be Delete Record below is code for it
public string DeleteData(Customer objcust)
{
SqlConnection con = null;
string result = "";
try
{
con = new SqlConnection(ConfigurationManager.ConnectionStrings["mycon"].ToString());
SqlCommand cmd = new SqlCommand("Usp_InsertUpdateDelete_Customer", con);
cmd.CommandType = CommandType.StoredProcedure;
cmd.Parameters.AddWithValue("@CustomerID", objcust.CustomerID);
cmd.Parameters.AddWithValue("@Name", null);
cmd.Parameters.AddWithValue("@Address", null);
cmd.Parameters.AddWithValue("@Mobileno", null);
cmd.Parameters.AddWithValue("@Birthdate", null);
cmd.Parameters.AddWithValue("@EmailID", null);
cmd.Parameters.AddWithValue("@Query", 3);
con.Open();
result = cmd.ExecuteScalar().ToString();
return result;
}
catch
{
return result = "";
}
finally
{
con.Close();
}
}
The Fourth operation will be Get All Records below is code for it
public List<Customer> Selectalldata()
{
SqlConnection con = null;
DataSet ds = null;
List<Customer> custlist = null;
try
{
con = new SqlConnection(ConfigurationManager.ConnectionStrings["mycon"].ToString());
SqlCommand cmd = new SqlCommand("Usp_InsertUpdateDelete_Customer", con);
cmd.CommandType = CommandType.StoredProcedure;
cmd.Parameters.AddWithValue("@CustomerID", null);
cmd.Parameters.AddWithValue("@Name", null);
cmd.Parameters.AddWithValue("@Address", null);
cmd.Parameters.AddWithValue("@Mobileno", null);
cmd.Parameters.AddWithValue("@Birthdate", null);
cmd.Parameters.AddWithValue("@EmailID", null);
cmd.Parameters.AddWithValue("@Query", 4);
con.Open();
SqlDataAdapter da = new SqlDataAdapter();
da.SelectCommand = cmd;
ds = new DataSet();
da.Fill(ds);
custlist = new List<Customer>();
for (int i = 0; i < ds.Tables[0].Rows.Count; i++ )
{
Customer cobj = new Customer();
cobj.CustomerID =Convert.ToInt32(ds.Tables[0].Rows[i]["CustomerID"].ToString());
cobj.Name = ds.Tables[0].Rows[i]["Name"].ToString();
cobj.Address = ds.Tables[0].Rows[i]["Address"].ToString();
cobj.Mobileno = ds.Tables[0].Rows[i]["Mobileno"].ToString();
cobj.EmailID = ds.Tables[0].Rows[i]["EmailID"].ToString();
cobj.Birthdate = Convert.ToDateTime(ds.Tables[0].Rows[i]["Birthdate"].ToString());
custlist.Add(cobj);
}
return custlist;
}
catch
{
return custlist;
}
finally
{
con.Close();
}
}
The fifth operation will be Get Data by CustomerID below is code for it.
public Customer SelectDatabyID(string CustomerID)
{
SqlConnection con = null;
DataSet ds = null;
Customer cobj = null;
try
{
con = new SqlConnection(ConfigurationManager.ConnectionStrings["mycon"].ToString());
SqlCommand cmd = new SqlCommand("Usp_InsertUpdateDelete_Customer", con);
cmd.CommandType = CommandType.StoredProcedure;
cmd.Parameters.AddWithValue("@CustomerID", CustomerID);
cmd.Parameters.AddWithValue("@Name", null);
cmd.Parameters.AddWithValue("@Address", null);
cmd.Parameters.AddWithValue("@Mobileno", null);
cmd.Parameters.AddWithValue("@Birthdate", null);
cmd.Parameters.AddWithValue("@EmailID", null);
cmd.Parameters.AddWithValue("@Query", 5);
SqlDataAdapter da = new SqlDataAdapter();
da.SelectCommand = cmd;
ds = new DataSet();
da.Fill(ds);
for (int i = 0; i < ds.Tables[0].Rows.Count; i++ )
{
cobj = new Customer();
cobj.CustomerID = Convert.ToInt32(ds.Tables[0].Rows[i]["CustomerID"].ToString());
cobj.Name = ds.Tables[0].Rows[i]["Name"].ToString();
cobj.Address = ds.Tables[0].Rows[i]["Address"].ToString();
cobj.Mobileno = ds.Tables[0].Rows[i]["Mobileno"].ToString();
cobj.EmailID = ds.Tables[0].Rows[i]["EmailID"].ToString();
cobj.Birthdate = Convert.ToDateTime(ds.Tables[0].Rows[i]["Birthdate"].ToString());
}
return cobj;
}
catch
{
return cobj;
}
finally
{
con.Close();
}
}
Here is complete view of DataAccessLayer
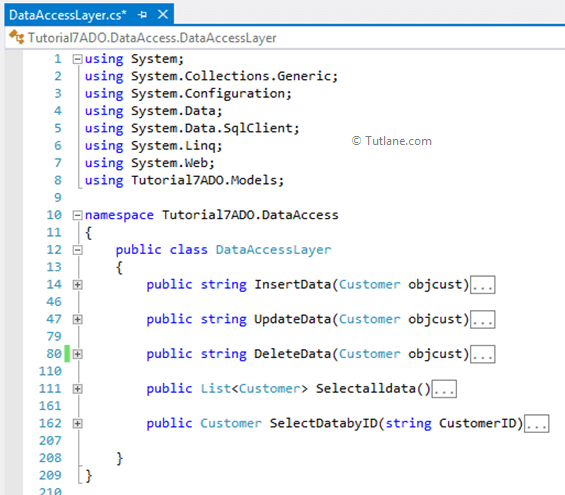
Finally we completed transaction part now let’s move towards Controller part.
Now let's return to the previously created controller (CustomController) now we are going to add another ActionMethod with name InsertCustomer which is going to take Customer Model as input Parameter.
using System;
using System.Collections.Generic;
using System.Linq;
using System.Web;
using System.Web.Mvc;
using Tutorial7ADO.Models;
namespace Tutorial7ADO.Controllers
{
public class CustomerController : Controller
{
//
// GET: /Customer/
[HttpGet]
public ActionResult InsertCustomer()
{
return View();
}
[HttpPost]
public ActionResult InsertCustomer(Customer objCustomer)
{
return View();
}
}
}
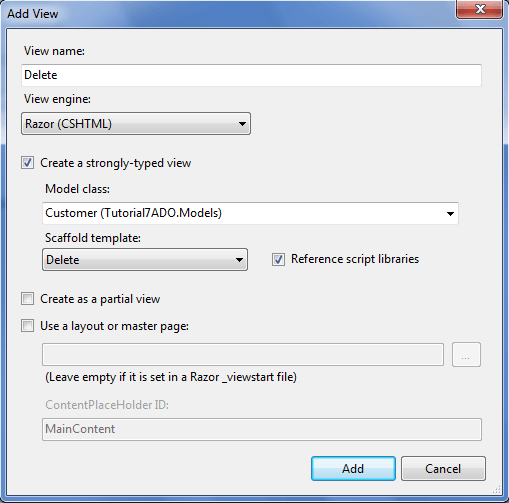
After completing add InsertCustomer now let’s add View to it. For adding View Just right click on Action result Insertcustomer add select "Add View"
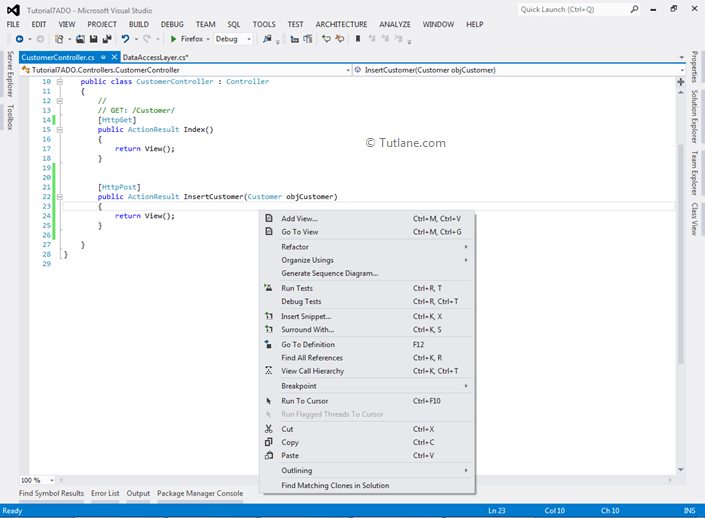
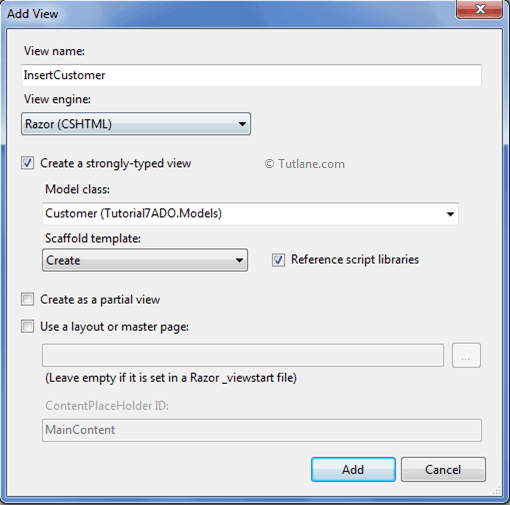
After selecting Add View we will get a New Window. In that just select create a strongly-typed view inside that select the Model Name as Customer which we created and in Scaffold Template select Create and finally click on Add
After adding like this a View will be generated with extension .cshtml that will contain code like as shown below
@model Tutorial7ADO.Models.Customer
@{
Layout = null;
}
<!DOCTYPE html>
<html>
<head>
<meta name="viewport" content="width=device-width"/>
<title>InsertCustomer</title>
</head>
<body>
<script src="~/Scripts/jquery-1.7.1.min.js"></script>
<script src="~/Scripts/jquery.validate.min.js"></script>
<script src="~/Scripts/jquery.validate.unobtrusive.min.js"></script>
@using (Html.BeginForm()) {
@Html.ValidationSummary(true)
<fieldset>
<legend>Customer</legend>
<div class="editor-label">
@Html.LabelFor(model => model.Name)
</div>
<div class="editor-field">
@Html.EditorFor(model => model.Name)
@Html.ValidationMessageFor(model => model.Name)
</div>
<div class="editor-label">
@Html.LabelFor(model => model.Address)
</div>
<div class="editor-field">
@Html.EditorFor(model => model.Address)
@Html.ValidationMessageFor(model => model.Address)
</div>
<div class="editor-label">
@Html.LabelFor(model => model.Mobileno)
</div>
<div class="editor-field">
@Html.EditorFor(model => model.Mobileno)
@Html.ValidationMessageFor(model => model.Mobileno)
</div>
<div class="editor-label">
@Html.LabelFor(model => model.Birthdate)
</div>
<div class="editor-field">
@Html.EditorFor(model => model.Birthdate)
@Html.ValidationMessageFor(model => model.Birthdate)
</div>
<div class="editor-label">
@Html.LabelFor(model => model.EmailID)
</div>
<div class="editor-field">
@Html.EditorFor(model => model.EmailID)
@Html.ValidationMessageFor(model => model.EmailID)
</div>
<p>
<input type="submit" value="Create"/>
</p>
</fieldset>
}
<div>
@Html.ActionLink("Back to List", "Index")
</div>
</body>
</html>
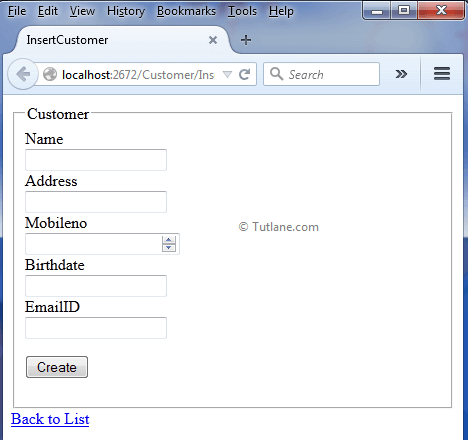
After complete adding View just run your application and check output for InsertCustomer View. Here is snapshot of InsertCustomer View
Now add InsertCustomer code of on [Httppost]. Inside this Method we just created object of DataAccessLayer and passed Customer Model to DataAccessLayer. Following is Insertcustomer Post method
[HttpPost]
public ActionResult InsertCustomer(Customer objCustomer)
{
objCustomer.Birthdate = Convert.ToDateTime(objCustomer.Birthdate);
if (ModelState.IsValid) //checking model is valid or not
{
DataAccessLayer objDB = new DataAccessLayer();
string result = objDB.InsertData(objCustomer);
ViewData["result"] = result;
ModelState.Clear(); //clearing model
return View();
}
else
{
ModelState.AddModelError("", "Error in saving data");
return View();
}
}
Next we will create a basic grid view for displaying records.
To get data we need to add new method ShowAllCustomerDetails in CustomerController like as shown below
[HttpGet]
public ActionResult ShowAllCustomerDetails()
{
return View();
}
Now we will add a new View to show data in grid format. For adding View Just right click inside ShowAllCustomerDetails Action method and add select "Add View" like as shown below
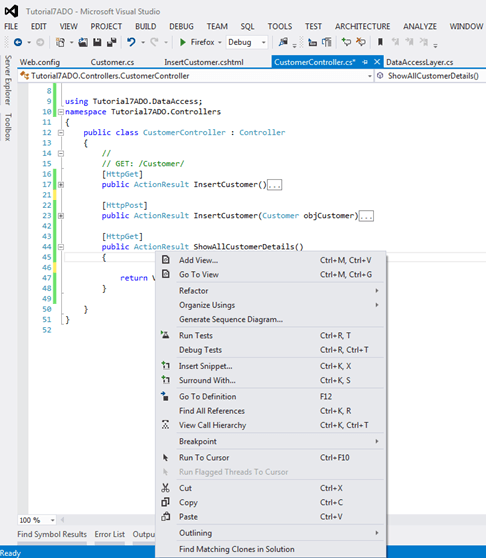
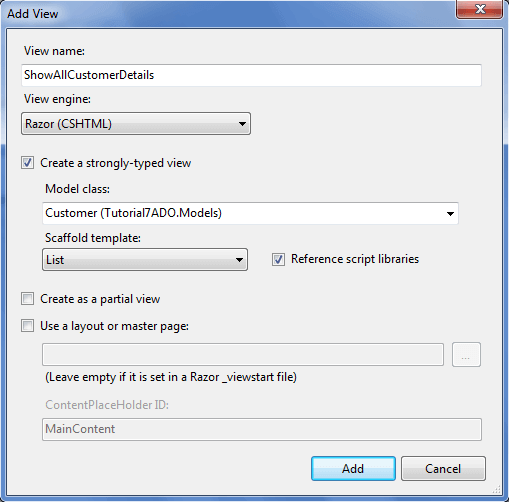
After selecting Add View we will get a New Window. Just select create a strongly-typed view and inside that select the Model Name as Customer which we created and in Scaffold Template select List and finally click on Add
After adding view we have to make some Manual changes in it because when we add View by select List in template then it creates a @model IEnumerable <Tutorial7ADO.Models.Customer> just need to change Tutorial7ADO.Models.Customer because we are already passing a List of Customer from this Model we do not required Model of IEnumerable type.
@model Tutorial7ADO.Models.Customer
@{
Layout = null;
}
<!DOCTYPE html>
<html>
<head>
<meta name="viewport" content="width=device-width"/>
<title>ShowAllCustomerDetails</title>
</head>
<body>
<p>
@Html.ActionLink("Create New", "Create")
</p>
<table>
<tr>
<th>
@Html.DisplayNameFor(model => model.Name)
</th>
<th>
@Html.DisplayNameFor(model => model.Address)
</th>
<th>
@Html.DisplayNameFor(model => model.Mobileno)
</th>
<th>
@Html.DisplayNameFor(model => model.Birthdate)
</th>
<th>
@Html.DisplayNameFor(model => model.EmailID)
</th>
<th></th>
</tr>
@foreach (var item in Model.ShowallCustomer)
{
<tr>
<td>
@Html.DisplayFor(modelItem => item.Name)
</td>
<td>
@Html.DisplayFor(modelItem => item.Address)
</td>
<td>
@Html.DisplayFor(modelItem => item.Mobileno)
</td>
<td>
@Html.DisplayFor(modelItem => item.Birthdate)
</td>
<td>
@Html.DisplayFor(modelItem => item.EmailID)
</td>
<td>
@Html.ActionLink("Edit", "Edit", new { id=item.CustomerID }) |
@Html.ActionLink("Details", "Details", new { id=item.CustomerID }) |
@Html.ActionLink("Delete", "Delete", new { id=item.CustomerID })
</td>
</tr>
}
</table>
</body>
</html>
Here in ShowAllCustomerDetails method we are getting data from database in form of List of Customer then we are assigning this value to ShowallCustomer of Customer Model and returning it to View.
[HttpGet]
public ActionResult ShowAllCustomerDetails()
{
Customer objCustomer = new Customer();
DataAccessLayer objDB = new DataAccessLayer(); //calling class DBdata
objCustomer.ShowallCustomer = objDB.Selectalldata();
return View(objCustomer);
}
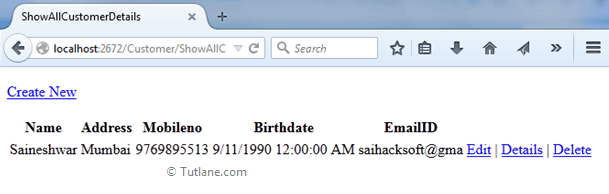
Now we are going run application and view your new ShowAllCustomerDetails page. Here is snapshot of ShowAllCustomerDetails View.
After complete adding ShowAllCustomerDetails page now we will implement Edit and Update parts of application. Let's add two new Action Methods to the same Controller for Edit/Update records.
First method Edit this Method will get Customer ID as input parameter and according to that it fetch records from database and display on View( )
[HttpGet]
public ActionResult Edit(string ID)
{
Customer objCustomer = new Customer();
DataAccessLayer objDB = new DataAccessLayer(); //calling class DBdata
return View(objDB.SelectDatabyID(ID));
}
After adding Edit action Method now lets add View related to it by Just right-click on ActionResult and Select Add a View. After selecting a New dialog will popup for asking view Configuration inside that we are going to select Customer Model as a strong type View and in Scaffold template we are going to select Edit finally click on Add button

After adding view here is code of Edit View generated
@model Tutorial7ADO.Models.Customer
@{
Layout = null;
}
<!DOCTYPE html>
<html>
<head>
<meta name="viewport" content="width=device-width"/>
<title>Edit</title>
</head>
<body>
<script src="~/Scripts/jquery-1.7.1.min.js"></script>
<script src="~/Scripts/jquery.validate.min.js"></script>
<script src="~/Scripts/jquery.validate.unobtrusive.min.js"></script>
@using (Html.BeginForm()) {
@Html.ValidationSummary(true)
<fieldset>
<legend>Customer</legend>
@Html.HiddenFor(model => model.CustomerID)
<div class="editor-label">
@Html.LabelFor(model => model.Name)
</div>
<div class="editor-field">
@Html.EditorFor(model => model.Name)
@Html.ValidationMessageFor(model => model.Name)
</div>
<div class="editor-label">
@Html.LabelFor(model => model.Address)
</div>
<div class="editor-field">
@Html.EditorFor(model => model.Address)
@Html.ValidationMessageFor(model => model.Address)
</div>
<div class="editor-label">
@Html.LabelFor(model => model.Mobileno)
</div>
<div class="editor-field">
@Html.EditorFor(model => model.Mobileno)
@Html.ValidationMessageFor(model => model.Mobileno)
</div>
<div class="editor-label">
@Html.LabelFor(model => model.Birthdate)
</div>
<div class="editor-field">
@Html.EditorFor(model => model.Birthdate)
@Html.ValidationMessageFor(model => model.Birthdate)
</div>
<div class="editor-label">
@Html.LabelFor(model => model.EmailID)
</div>
<div class="editor-field">
@Html.EditorFor(model => model.EmailID)
@Html.ValidationMessageFor(model => model.EmailID)
</div>
<p>
<input type="submit" value="Save"/>
</p>
</fieldset>
}
<div>
@Html.ActionLink("Back to List", "Index")
</div>
</body>
</html>
After completion of adding Edit View now let’s move towards another Action Method of Edit (HttpPost) for posting data. Creating the same ActionResult of Edit with a model as a parameter for post data.
[HttpPost]
public ActionResult Edit(Customer objCustomer)
{
objCustomer.Birthdate = Convert.ToDateTime(objCustomer.Birthdate);
if (ModelState.IsValid) //checking model is valid or not
{
DataAccessLayer objDB = new DataAccessLayer(); //calling class DBdata
string result = objDB.UpdateData(objCustomer);
ViewData["result"] = result;
ModelState.Clear(); //clearing model
return View();
}
else
{
ModelState.AddModelError("", "Error in saving data");
return View();
}
}
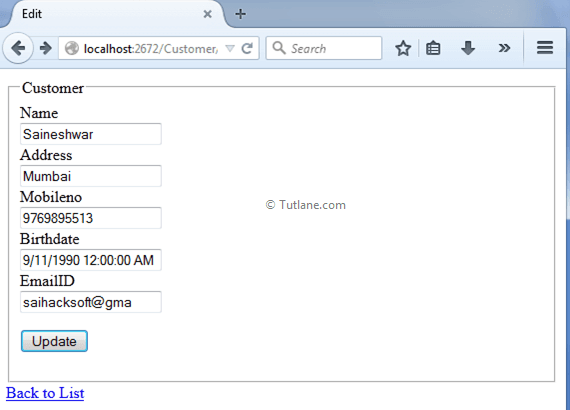
Here is snapshot of Edit/Update View.
This will post data when the user will click the Update Button to Edit Controller. We have completed Edit/Update part of Controller and View lets finally move towards last option Delete. Let's add two new Action Methods to the same Controller for Deleting Records.
In this ActionResult we will give a string id to the method to receive an ID when we click on the Delete button. Here we will send ID and get data from the database depending on that id display complete records and then it is possible to delete records.
[HttpGet]
public ActionResult Delete(string ID)
{
Customer objCustomer = new Customer();
DataAccessLayer objDB = new DataAccessLayer(); //calling class DBdata
return View(objDB.SelectDatabyID(ID));
}
After adding Delete action Method now let's add View related to it by just right-click on ActionResult and Select Add a View. After selecting a new dialogue will pop up for asking view Configuration inside that we are going to select Customer Model as a strong type View and in Scaffold template we are going to select Delete finally click on Add button
After adding the view here is design of Delete View generated.
@model Tutorial7ADO.Models.Customer
@{
Layout = null;
}
<!DOCTYPE html>
<html>
<head>
<meta name="viewport" content="width=device-width"/>
<title>Delete</title>
</head>
<body>
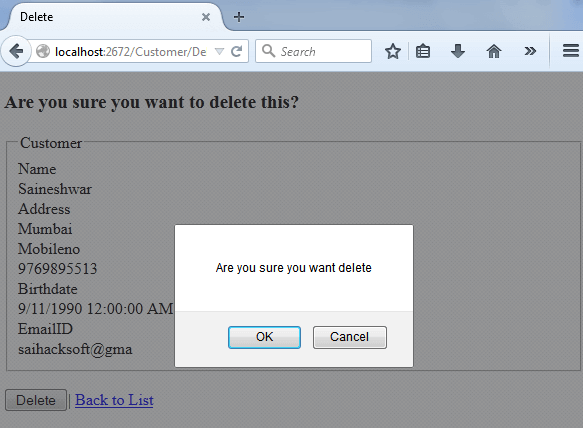
<h3>Are you sure you want to delete this?</h3>
@using (Html.BeginForm())
{
<fieldset>
<legend>Customer</legend>
@Html.HiddenFor(model => model.CustomerID)
<div class="display-label">
@Html.DisplayNameFor(model => model.Name)
</div>
<div class="display-field">
@Html.DisplayFor(model => model.Name)
</div>
<div class="display-label">
@Html.DisplayNameFor(model => model.Address)
</div>
<div class="display-field">
@Html.DisplayFor(model => model.Address)
</div>
<div class="display-label">
@Html.DisplayNameFor(model => model.Mobileno)
</div>
<div class="display-field">
@Html.DisplayFor(model => model.Mobileno)
</div>
<div class="display-label">
@Html.DisplayNameFor(model => model.Birthdate)
</div>
<div class="display-field">
@Html.DisplayFor(model => model.Birthdate)
</div>
<div class="display-label">
@Html.DisplayNameFor(model => model.EmailID)
</div>
<div class="display-field">
@Html.DisplayFor(model => model.EmailID)
</div>
</fieldset>
<p>
<input id="Submit1" onclick="return confirm('Are you sure you want delete');"
type="submit" value="Delete"/>|
@Html.ActionLink("Back to List", "Index")
</p>
}
</body>
</html>
Here is snapshot of Delete View

After complete adding Delete View now let’s move towards another Action Method of Delete (HttpPost) for posting data. Creating the same ActionResult of Delete with a model as a parameter for post data.
[HttpPost]
public ActionResult Delete(Customer objCustomer)
{
DataAccessLayer objDB = new DataAccessLayer();
string result = objDB.DeleteData(objCustomer);
ViewData["result"] = result;
ModelState.Clear(); //clearing model
return View();
}
This will post data when the user clicks the Delete Button. Here is snapshot of Delete View.
Finally we completed performing complex custom CRUD operations using ADO.NET in asp.net mvc application