LINQ to Entities means writing LINQ queries over entity framework objects. Generally, the Entity Framework is an ORM (Object Relational Mapper) that creates database tables as objects, and we will call these objects as entities. Using these entities, we can perform any operation like insert, update delete, etc.
Here we will see how to use LINQ with Entities; we will create one new web application and connect with SQL Server using Entity Framework. By using the entity framework, we will display the data in gridview.
First, we will create one new “EmployeeDetails” table in the database. For that, execute the following query in your database and insert some dummy data to show it in the application.
Once we execute above query table will create with data as shown below.

Now, we will create a new web application for that Go to File à Select New à Select Project like as shown below.
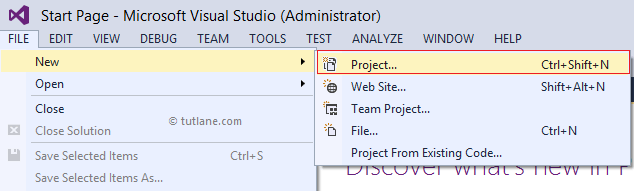
Once we select a new project, a new popup will open in that select Asp.Net Empty Web Application and give name as “LINQtoADONET” and click OK to create a new web application as shown below.

Once we click OK new popup will open in that select Empty template and click OK like as shown below.

To use Entities with LINQ, we need to add an ADO.NET Entity Data Model in our application. This ADO.NET Entity Data Model is the step-by-step process of importing SQL tables and converting them into objects using the Entity Framework Database First technique.
To add ADO.NET Entity Data Model, right-click on your application à select Add à Select New Item à select ADO.NET Entity Data Model à Give name as “EmployeeEntity” and Click OK like as shown below.

Once we add ADO.NET Entity Data Model, a new popup will open, as shown below the screen. Here we have already created the database with a table for our application, so we will select “EF Designer from Database” and click Next like as shown below.

Once we click the Next button, the following screen will appear. Now, we need to configure our database for that click on the New Connection button as shown below.

Once we click on the New Connection button, a new window will open in that choose a data source as “Microsoft SQL Server” and click Continue like as shown below.

Once we click Continue, the connection properties window will open in that mention all required connection properties to connect the required database, as shown below.

Once you enter all the details, click “Test Connection” to test whether all the connection properties are correct or not. If all the details are correct, we will get a message like “Test Connection Succeeded” as shown below.

Once the connection succeeds, click the OK button; all the connection configurations will be added to our data connection, as shown below.

Now click the Next button; it will show all the database objects available in the respective database from that select required table and click Finish like as shown below.

Once we click Finish Button, Entity Data Model will create in our application with our required tables that will be like as shown below.

Once we add the Entity Data Model file, our project will be as shown below.

If you observe the above project structure, we have context file “MySampleDBEntities” it contains our database connection settings that will be as shown below.
If you observe the above class, it inherits from DbContext class. In the constructor, it has specified the name as ”MySampleDBEntities”. So we will be using this to create an object of the context class to access our objects using Entity Framework. Also, it creates a Dbset of type EmployeeDetail to interact with the database. If we include more tables in your Entity Model, you need to specify the Dbset of the new class type.
We have another class “EmployeeDetail.cs” file that contains all the properties of the EmployeeDetail table we selected while creating the Entity Data Model that will be like as shown below.
For every table that we selected from the database, a class file will be generated by the Entity Framework automatically.
Now we will add the web page to the application for that Right-click on your application à select Add à New Item à Select Web Form à give name as “Default.aspx” and click the OK button it will create a new page in the application.
Now open the Default.aspx page and write the code as shown below.
Now open the code behind file and write the code as shown below.
If you observe the above example, we created an object for the context file “MySampleDBEntities” to access database objects. Now we will run and see the output of the application.
Following is the result of the LINQ to Entities example.

This is how we can use entities with LINQ to get the required data from the database.